Showing posts with label Graciellie Design. Show all posts

Wednesday, August 23, 2017

Monoprinted Background & Floral Greetings

It's Gracie Chavez with a new card to share and this time I'm bringing lots of sparkle and mixed media to cheer up your day.

To make today's card I monoprinted a background with my gel press, a stencil and craft paints and once I removed the card panel from the gel press, while the paint was still wet I sprinkled glitter, mica and other beautiful texture elements that add shimmer to to the card.


I made a border using a strip of patterned paper and an SVG border cut that I created and then added two flowers lightly colored and fussy cut. Finally I stamped a Happy Birthday sentiment, in beautiful cursive font, on a matching patterned paper banner. This Magnolia flower and this sentiment are from a set I designed for SNSS called Floral Greetings. 


Hope you enjoyed today's post. Until next time!


Thursday, July 6, 2017

Color Pencils and Mason Jar Bouquet Flowers

Hello it's Gracie Chavez from Graciellie Design. Coloring mediums have been all I've thought about this year, from Zig markers to watercolors... But today I'm trying out Prismacolor pencils for the first time! It is a different medium, slower to begin with, but it is -oh so totally- worth it!


I decided to use Sweet 'n Sassy Stamps Mason Jar Bouquet flowers to try out my Prismacolors for the first time. I didn't use any solution to blend the colors, I simple did it the classic way... Layering. Layering requires patience and if you have some form of arthritis you'll feel uncomforable at some point but if you don't press the pencil too hard, apply the color with small circular strokes you will achieve a neat transition.

The flowers turned out so delicate and pretty that I decided to create a very intricate lace card base for them using Anna Griffin's Elegant Embellishments 2 cartridge on my new Cricut Explore Air 2. This card has so many delicate layers and it makes the images look even more classic and elegant. I decided to add a sentiment from my clear stamp set Floral Greetings released by Sweet 'n Sassy Stamps early this year. And I think nothing says classic like ribbon so I tied a matching pink bow around the card front and embellished it with a gold button.  


If you want to take a closer look at these stamps visit SNSS shop here. There are many, many more beautiful stamp sets to choose from and even 2 more clear stamp sets I designed myself. That is all for now. I hope you give this coloring medium a try one of these days too! Until next time.


Tuesday, June 6, 2017

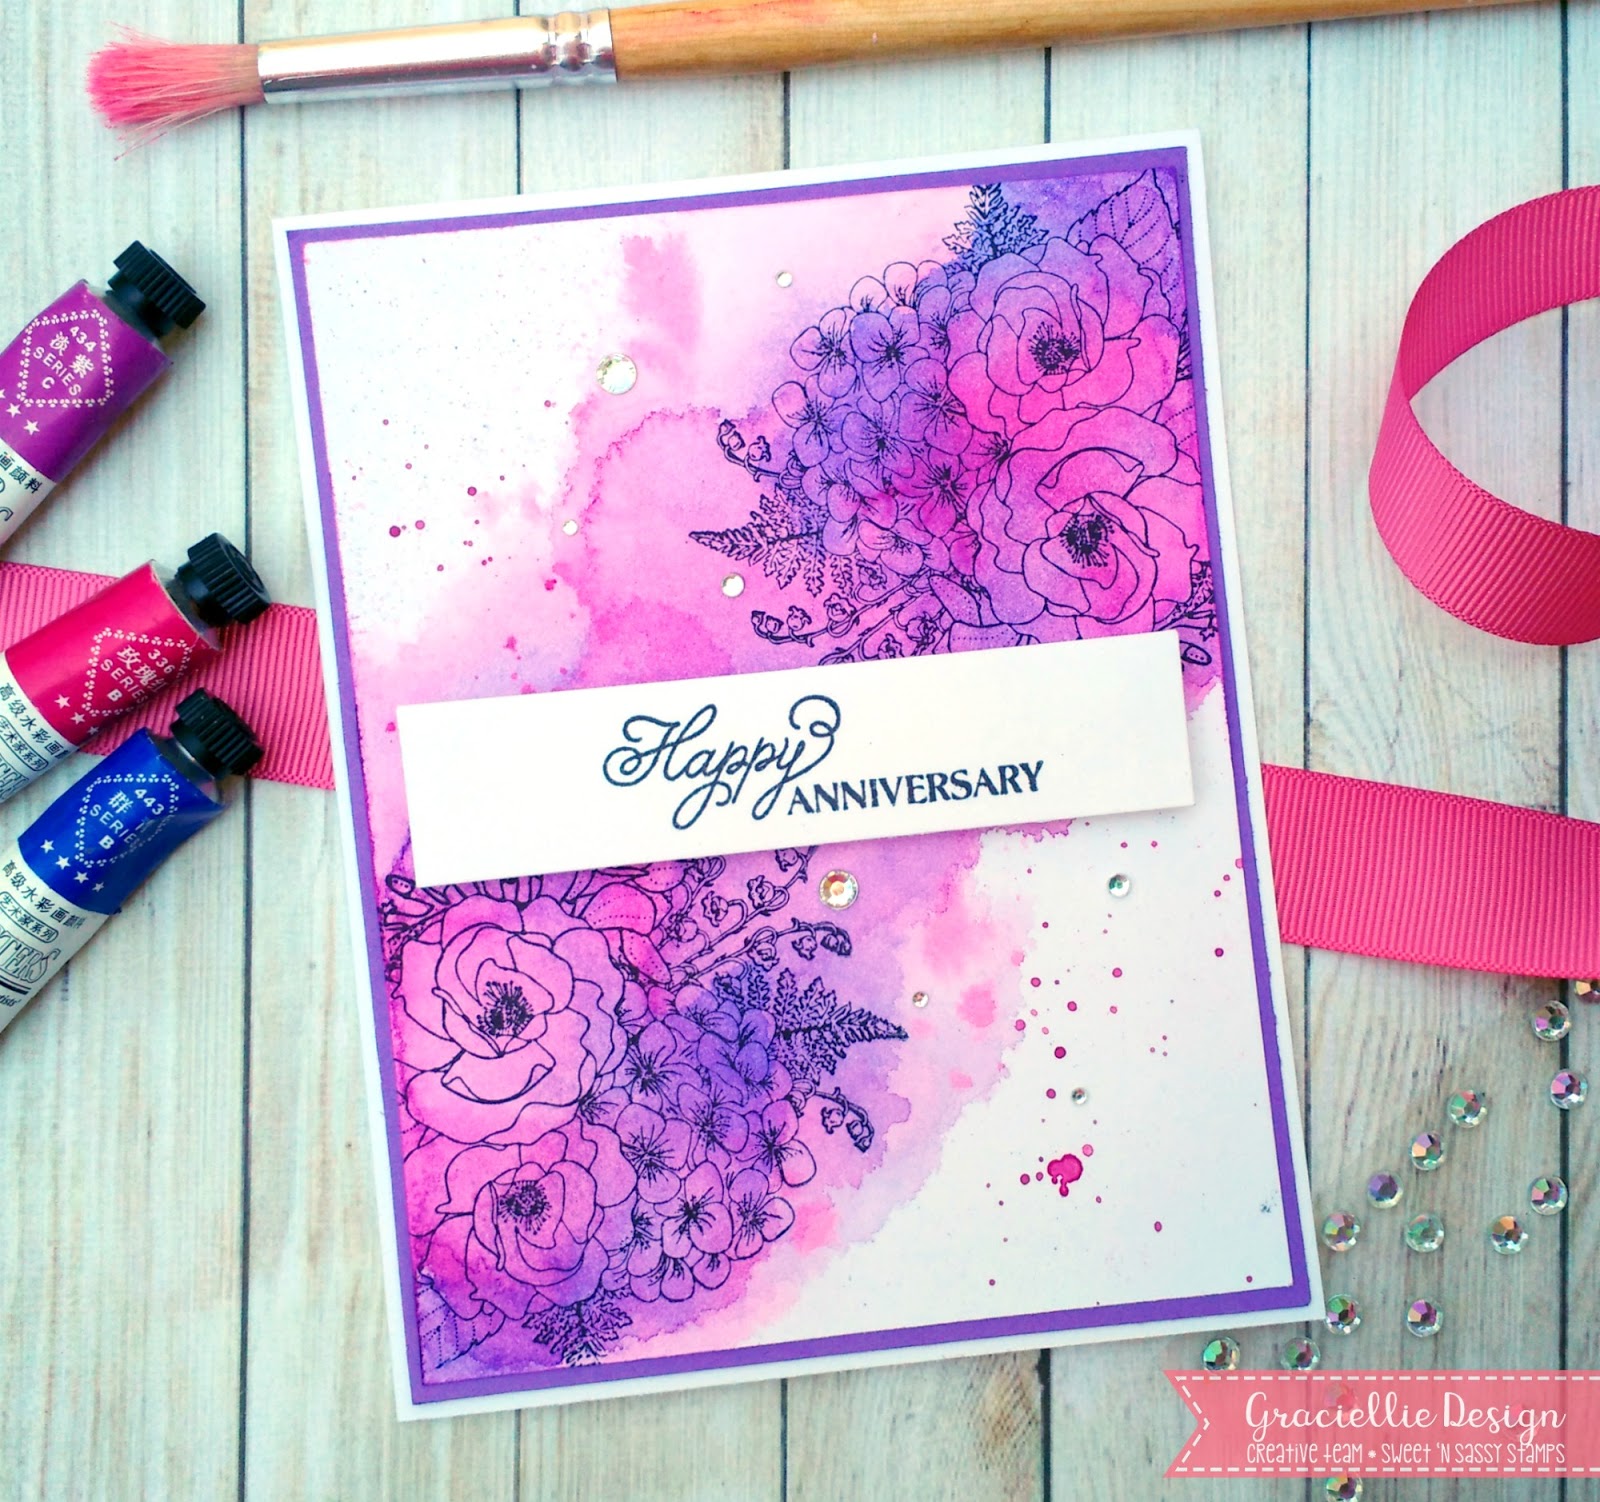
Watercolor Wash with Mason Jar Bouquet

It's Gracie Chavez from Graciellie Design with a fun and colorful card idea to share today using one of Sweet 'n Sassy Stamps' new set Mason Jar Bouquet.


I stamped part of the bouquet on two corners of the card front in black using premium dye ink. To make sure the ink wouldn't smear I heat set it well. I used a very pigmented set of watercolors in Rose, Purple Pale and Ultramarine Blue to create a wash across the card front. I kept layering color until I was happy with the result. I added some splatters and iridescente rhinestones to finish off the background and attached a stamped banner with a piece of foam strip to give it some dimension.


I hope you enjoyed today's card! Thanks for stopping by.


Saturday, April 22, 2017

DIY Patterned Paper & Stained Flowers Technique

Hello! It's Gracie from Graciellie Design. Today I have a fun technique to share with you... Floral specialty papers can be beautiful, especially when they have a metallic finish. I decided to go ahead and try to make my own using Floral Greetings and Peaceful Peonies from Sweet 'n Sassy Stamps and Laser Silver Lustre paper.


I stamped the flower multiple times to create a pattern. I used Color Box Mix'd Media Inx in Truffe and heat embossed it with Bridal Tinsel embossing powder from Ranger. I then colored the flowers applying a bit of Zig markers and spreading the color using my fingers. I kept layering the color until I was happy with the shading. This technique gives the flowers a stained look. The glossy paper allows the color to glide and you end up getting a different coloring effect.

I used the same ink to stamp the sentiment on Heavyweight Vellum 48# and cut a banner. I decided to fussy cut 2 flowers from the remainding stamped paper and adhere them on top of a simple pink frame cut from Mountain Rose Glimmer cardstock -which goes along perfectly with the Rose Quartz Mica / Metallic card base. To add dimension to the frame and flowers I used 3D Foam Strips and Foam Squares.


I hope you enjoyed today's project idea. Make sure to visit Sweet 'n Sassy Stamps to check out these and other new clear stamp sets available now. For more ideas and inspiration visit SNSS blog!

Thanks for visiting.


Thursday, April 6, 2017

Foiled Stamped Flowers with Floral Greetings & Peaceful Peonies

Hello, it's Gracie Chavez from Graciellie Design. I love using transparencies on cards. I usually use vellum because of how delicate it looks. So I decided to use one of Sweet 'n Sassy's latests flower stamp from a set I designed -Floral Greetings- in a non-traditional way. I used a quick and easy DIY technique to foil the flowers on heavyweight vellum to create these stamped embellishments.


First, I stamped the flowers using pigment ink (which works just as well as any embossing ink), and I then heat embossed the images in gold. But because I wanted to create a metallic on metallic effect I went ahead and foiled the flowers in silver. All I did was cover the images with a piece of silver foil transfer sheet and ran them through a laminator making sure to wrap the stamped flowers within at least 2 copy paper sheets folded in half, to avoid the embossing powder from melting completely. This trick will allow you to get a distressed foil effect that lets some of the embossed areas to show. In the end, you get a beautiful silver on gold metallic finish.


I fussy cut the flowers and used them to frame the wonderful verse from Peaceful Peonies. I layered a few die cuts and used metallic, shimmery, gorgeous papers to go along with the metallic tones on the images. I added a few touches of beige here and there to make the sentiment pop and tie all the monochromatic layers together. I love the result, but I'm sure this card wouldn't have been the same without these beautiful stamps!


For more details on these and other stamp sets from our latest releases please visit Sweet 'n Sassy Stamps shop. For more inspiration make sure to subscribe to the blog so you never miss our design team's projects. (There is so much inspiration here!)

Thanks so much for stopping by.

Saturday, March 25, 2017

Trust God - Words of Life & Peaceful Peonies

Hello. This is Gracie Chavez. Today I want to share a new card using 2 different stamp sets to create a focal sentiment and a verse to go along with it plus a beautiful watercolored peony.


This cards has a striking, beautiful color palette. The fun polka dot pattern on the background adds a fun touch to the card. This is a bright and feminine ensemble that says Summer all along.


The encouraging word and verse are perfect for the card front. I used one of the words from Words of Life: Actions as the focal sentiment and then I stamped right under it a verse from Peaceful Peonies. I framed the inspiring sentiment with decorative die cuts and a heat embossed peony I colored with watercolor markers.


I invite you to stop by Sweet 'n Sassy Stamps shop to take a closer look at these and many other new stamps from our new releases. The shop has also a 50% off stamp and die sale you might like! For more inspiration remember to follow SNSS blog, where the design team share project ideas and lots of inspiration!

Thanks so much for visiting.


Friday, March 3, 2017

A Pop of Yellow - Spring Inspiration with Floral Greetings

Hello! It's Gracie Chávez and today I want to brighten up your day with a pop of yellow with this fresh and Spring forward handmade card. A splash of watercolor and some alcohol marker coloring against a clean background sure makes you dream of Spring and Summer...


I used my latest stamp design for Sweet 'n Sassy Stamps, Floral Greetings. You get 2 floral images in this set and I decided to go with the Camellia bloom this time. I stamped it multiple times and fussy cut 2 flowers and as many leaves I could. Although the background was watercolored the flowers were colored with Spectrum Noir markers in different tones of yellow.


I used the flowers to frame the minimalist die cut circle wreath and added a few strips of color paper to break the structure of the card front at the same time that it blends in the color palette. Finally I adhered a banner with a greeting stamped and heat embossed in gold on vellum and added some rhinestones to finish the card.


More inspiration using this stamp set can be found on the blog! The design team has come up with brilliant ideas using this flowers. I can't wait to see what you create with it! Visit the shop and get this and other new sets today.

Thanks for stopping by!

Saturday, February 18, 2017

Birthday Dog Roses with new stamps from Floral Greetings

It's Gracie Chávez and today I'm here to share a new card using the new stamp set Floral Greetings. I had the absolute joy to put together this set for Sweet 'n Sassy Stamps that includes two beautiful floral images and a collection of greetings for every occasion!

My card for today is very clean with a striking color palette. I wanted the flowers to stand out more than anything else. I colored them -guiding myself by dog roses pictures- in two tones of pink and decoupaged them to add more dimension.


To create the decoupage effect I stamped the dogrose branch twice to the background and colored the images. I also stamped the flowers on another piece of white cardstock and colored them. I then fussy cut them and adhere them on top of the previously stamped background, offsetting the flowers a bit to make them look fuller.


I hope you enjoyed today's post! Make sure to take a minute and stop by the shop to take a closer look to this and other new stamps from our new release at Sweet 'n Sassy Stamps. Have a crafty, happy weekend!