Showing posts with label coloring. Show all posts

Tuesday, June 6, 2017

Watercolor Wash with Mason Jar Bouquet

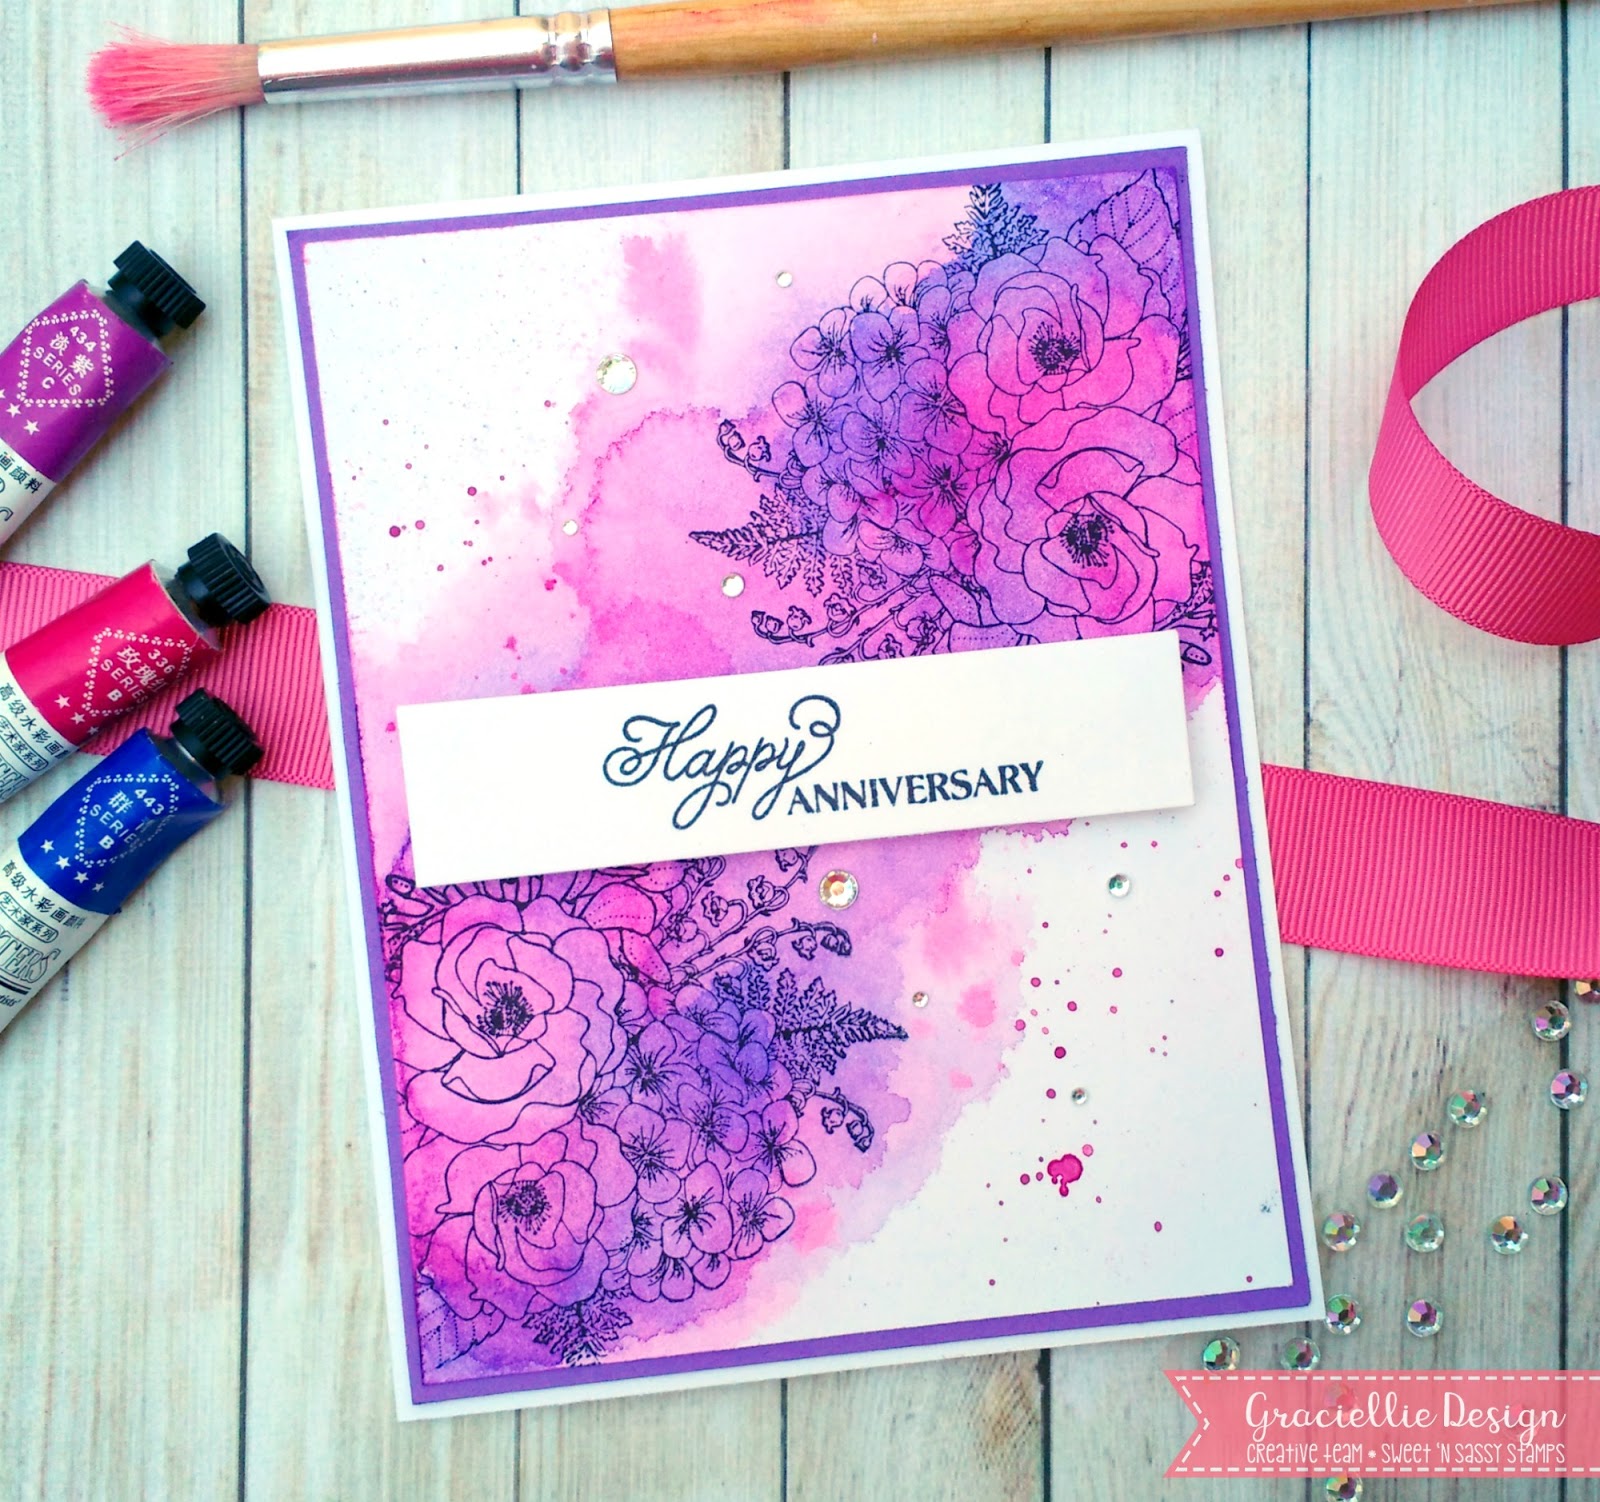
It's Gracie Chavez from Graciellie Design with a fun and colorful card idea to share today using one of Sweet 'n Sassy Stamps' new set Mason Jar Bouquet.


I stamped part of the bouquet on two corners of the card front in black using premium dye ink. To make sure the ink wouldn't smear I heat set it well. I used a very pigmented set of watercolors in Rose, Purple Pale and Ultramarine Blue to create a wash across the card front. I kept layering color until I was happy with the result. I added some splatters and iridescente rhinestones to finish off the background and attached a stamped banner with a piece of foam strip to give it some dimension.


I hope you enjoyed today's card! Thanks for stopping by.


Wednesday, May 3, 2017

Mother's Day Card with Mason Jar Bouquet

It's Gracie Chavez and today I'm sharing my first card using one of Sweet 'n Sassy's new stamp set Mason Jar Bouquet! This set is so pretty, so versatile and is perfect for coloring.


I stamped the flowers in hot pink dye ink and colored them in the same color, to create a tone on tone effect. I have been using watercolor markers to color a lot lately and I've also been drawn to bright, summer colors. I watercolored this flowers in hot pink using very little water and added a fresh green on the leaves. I decided they would look great with a few green leaf die cuts. I used foam squares to give them dimension.

The sentiments in this set are so beautiful, a very nice font and size. I was able to stamp this Mother's Day greeting  in black, on one side of the die cut panel matching the rest of the card design.


The images are so striking and pretty I really didn't need to do much for my card base. I just die cut a large intricate panel, cut it in half and layered the pieces creating a lace border like design. Details such as the black ribbon and pearls tie the card together.

I hope you enjoyed today's post! Until next time.


Saturday, April 22, 2017

DIY Patterned Paper & Stained Flowers Technique

Hello! It's Gracie from Graciellie Design. Today I have a fun technique to share with you... Floral specialty papers can be beautiful, especially when they have a metallic finish. I decided to go ahead and try to make my own using Floral Greetings and Peaceful Peonies from Sweet 'n Sassy Stamps and Laser Silver Lustre paper.


I stamped the flower multiple times to create a pattern. I used Color Box Mix'd Media Inx in Truffe and heat embossed it with Bridal Tinsel embossing powder from Ranger. I then colored the flowers applying a bit of Zig markers and spreading the color using my fingers. I kept layering the color until I was happy with the shading. This technique gives the flowers a stained look. The glossy paper allows the color to glide and you end up getting a different coloring effect.

I used the same ink to stamp the sentiment on Heavyweight Vellum 48# and cut a banner. I decided to fussy cut 2 flowers from the remainding stamped paper and adhere them on top of a simple pink frame cut from Mountain Rose Glimmer cardstock -which goes along perfectly with the Rose Quartz Mica / Metallic card base. To add dimension to the frame and flowers I used 3D Foam Strips and Foam Squares.


I hope you enjoyed today's project idea. Make sure to visit Sweet 'n Sassy Stamps to check out these and other new clear stamp sets available now. For more ideas and inspiration visit SNSS blog!

Thanks for visiting.


Friday, March 3, 2017

A Pop of Yellow - Spring Inspiration with Floral Greetings

Hello! It's Gracie Chávez and today I want to brighten up your day with a pop of yellow with this fresh and Spring forward handmade card. A splash of watercolor and some alcohol marker coloring against a clean background sure makes you dream of Spring and Summer...


I used my latest stamp design for Sweet 'n Sassy Stamps, Floral Greetings. You get 2 floral images in this set and I decided to go with the Camellia bloom this time. I stamped it multiple times and fussy cut 2 flowers and as many leaves I could. Although the background was watercolored the flowers were colored with Spectrum Noir markers in different tones of yellow.


I used the flowers to frame the minimalist die cut circle wreath and added a few strips of color paper to break the structure of the card front at the same time that it blends in the color palette. Finally I adhered a banner with a greeting stamped and heat embossed in gold on vellum and added some rhinestones to finish the card.


More inspiration using this stamp set can be found on the blog! The design team has come up with brilliant ideas using this flowers. I can't wait to see what you create with it! Visit the shop and get this and other new sets today.

Thanks for stopping by!

Monday, February 6, 2017

Mixed Media Inspiration with Lotus Flower

It's Gracie Chavez from Graciellie Design and it's an honor to share on the Sweet 'n Sassy Stamps blog for the first time! Today I bring you some mixed media inspiration using the beautiful Lotus Flower stamp. 


The Lotus Flower was actually digitally stamped. (It is also available as a clear stamp and is currently on SALE here!) I printed the image on a laser printer and foiled it using a laminator with a beautiful Amber Watercolor foil transfer sheet. Once the image is foiled it will allow you to play with resist techniques since it works just as an embossing powder would. I went ahead and painted the flowers with pigment inks, picking up the inks with a waterbrush. After the ink dried I added a few accents to the petals using pink tones of Pan Pastel, applying it directly with my fingers. To soften and add a subtle shimmer to the images I applied a tad bit of Metallic Silver Pan Pastel too.


To make the flowers stand out I fussy cut them and adhered them to a very textured background. It may not show as much but there's a stenciled clear embossing paste pattern to which I added iredescent glitter behind the flowers. Additional texture on the corners of the card was created with drywall joint tape, which I also colored with some Pan Pastel. I added depth to the background with a few splashes of Ink Spray. Finishing touches include foil washi tape and rhinestones, a die cut piece, ribbon and paper twine!

I hope you enjoyed today's post! This and many other sets including a background stamp I designed for Sweet 'n Sassy Stamps are on sale now (50% off)! Do stop by the shop and grab your favorites... Sale will be up while supplies last and these sets will be gone for good!


Wednesday, August 17, 2016

Birthday Wishes with Winnie

Hello everyone! Today I want to show you a card that's made with the stamps from Summer Fun Winnie  (and a little word from Winnie's Warm Wishes).
I stamped Winnie and the little banner with a black ink on kraft cardstock. I colored her with colored pencils from Derwent (coloursoft). These pencils have a lot of pigment in them so they work pretty well on kraft papers. I used a stencil and white ink for the background.
http://www.sweetnsassystamps.com/summer-fun-winnie-clear-stamp-set/ http://www.sweetnsassystamps.com/winnies-warm-wishes-clear-stamp-set/

Have a nice day!
- Lucinde

Thursday, June 16, 2016

The Good Shepherd

Hello everyone! Lucinde here. It's my first time sharing a card on this blog, but you might know me from my blogs at Creative Worship. Today I want to show you a card that's made with one of the Creative Worship stamps sets. Eventhough they're made for bible journaling, that doesn't mean you can't use them for cards! I think I might use some sets more often for cards than for journaling ;).

For this card I stamped a little scene with the stamps from 'Good Shepherd'. I love the little sheeps! I stamped the shepherd first and masked him to stamp the hills in the background. I colored the images with colored pencils and diecut the frame around the scene. After that all I had to do is adhering everything onto my card.
I hope I could inspire you to create today! And don't forget to take a look at the new stamp sets from this month, they're amazing!

- Lucinde
http://www.sweetnsassystamps.com/creative-worship-good-shepherd-clear-stamp-set/


Tuesday, August 19, 2014

Relax!

Hello! Good day! It is Gloria with you today. I have a beach-themed card to share. I had some fun with the NEW Beauty By the Sea stamps and August Release die cuts


I created a standard 5 1/2 x 4 1/4 inch card (top fold) with a soft color palette and some wonderful starfish images!


I stamped the starfish images onto printed cardstock and colored them with alcohol markers. I used the Beauty By the Sea die set to cut the starfish. Don't they look amazing?! I used a photo slide frame to hold my little beachy cluster. 


For this cluster, I used a punched postage image and some twine to "anchor" my die cut starfish. I stamped the sentiment from the Beauty By the Sea set and cut it out in a banner shape.


Here is a peek at the inside of the card. I stamped the Scripture sentiment from the Beauty By the Sea set in brown ink. I also added another die cut starfish.

Thanks for looking!