Showing posts with label Peace of God. Show all posts

Sunday, October 23, 2016

May God Grant You Peace & Strength

Hi Sweet Friends! 

Happy Sunday! Julie, here sharing a Clean and Simple card with Peace of God Clear Stamp Set from Sweet ‘n Sassy Stamps.


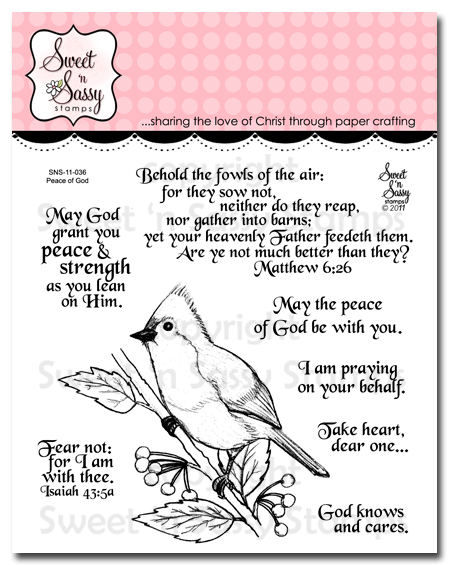
I love all of the image, sentiments and verses in the SNSS Peace of God Clear Stamp Set!  My husband and I feed the birds and the Tufted Titmouse is one of our favorites (we affectionately refer to them as "Tufty" or "Tufties").  
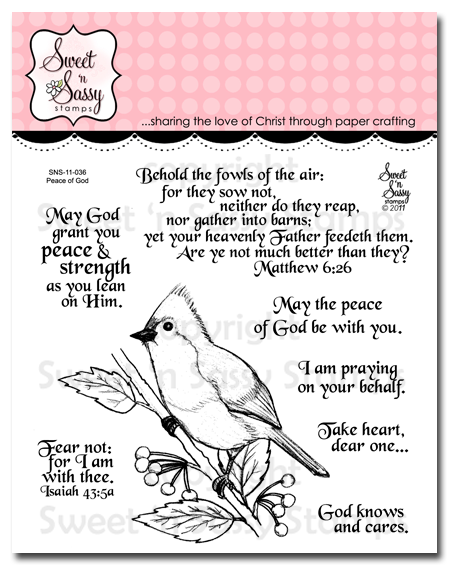
This set makes me smile when I create with it as I recall the fun memories of "bird watching" with my sweetheart- we truly have such an Awesome Creator God!!

I started off by stamping the SNSS Peace of God "Tufty" image with archival black ink onto white cardstock,  used a water brush  to color the image with distress inks , die cut with a stitched circle die and mounted onto another stitched circle die cut from cherry cardstock.

I stamped the sentiment onto a piece of white cardstock with archival black ink before scoring a few lines for texture and mounting the entire panel onto the cherry card base.

To finish off the card, I added the focal image with dimensional foam.  Quick, easy and a delight to create!


Thanks for stopping by- I hope all of you have a fabulous week!

Friday, September 23, 2016

Peace & Joy

Hello Sweet Friends! Julie sharing a Clean and Simple Mixed Media Christmas card using Sweet ‘n Sassy Stamps  Peace of God along with Season of Love.


To create this card, I stamped the tufted titmouse image from the  Peace of God Clear Stamp Set and the sentiment from Season of Love Clear Stamp Set using black archival ink, used distress inks with a water brush to watercolor the bird (adding highlights with a Sharpie White Extra Fine Point Pen) and mounted both onto gray cardstock.

I had the snowflake embossed panel in my stash and applied shimmer paint over the panel before mounting onto a piece of gray cardstock and adhering the entire panel onto the bright pink card base.

I mounted the titmouse along with the sentiment with dimensional foam and dded the silver cord to finish off the card.

If you have not started on your Christmas cards yet, I hope I have inspired you to do so :-)

Hugs and have a blessed week, my sweet friends!

Wednesday, December 23, 2015

Christmas Wishes


Merry Christmas week, Sweet Friends!  Julie here to share a card created with three sets- Peace of God, Winter Blessings and We Three Kings. I think it is fabulous that we can mix and match Sweet 'n Sassy Stamps and they work so well together :-)

I just love the Tufted Titmouse image along with all of the sentiments and verses in the Peace of God stamp set, don’t you?  

My hubby and I love watching birds and “Tufty” as we like to call him (or her), is one of our all-time favs! Along with chickadees, they dart into the feeders and grab a peanut and/or seed and "run" :-)  So much energy and such a joy to watch for sure!

This card was fun to create with a bit of watercoloring, masking, stenciling, sewing, die-cutting (with the Doily Border Dies), dry embossing and of course, layering- well, I just decided to throw everything into the mix- lol!!


Woohoo!  Only two more days until we celebrate Christmas- Merry Christmas to all of you and I hope you have a blessed New Year!!


Sunday, October 11, 2015

Winter Blessings Quilt (Sneak Peek)

Hello there friends,  Julie here to share a card that I created using Peace of God (for the sentiment) along with a sneak peek of Winter Blessings (to be released on 10/16/15).

I just love the new set, Winter Blessings and decided to use this set to create my own "Designer"  Paper :-)

To create this card:

Side view to show a sneak peak of the new
Winter Blessings Stamp Set 
Sponge several different purple inks onto a piece of white cardstock, dry the ink thoroughly (you can use a Heat Tool for this step), ink the new Winter Blessing stamp with an Embossing Ink and stamp over the sponged panel, apply White Embossing Powder and heat set it with the Heat Tool.

To create the “quilt”, use a 1 ¼” Square Punch to punch out the squares from the newly created background panel (along with white cardstock), cut the squares in half diagonally by hand and mount onto a piece of cardstock in the quilt pattern.

Use a sewing machine with white thread to stitch along the “seams” and finish the edges of the quilt with ribbon strips (wrapped and secured behind the quilt panel).

View of the quilt 
Add a strip of remaining “homemade” background paper to an embossed piece of white cardstock (I used a snowflake embossing folder) and mount the focal “quilt” panel with dimensional foam.

To finish off the card, add the stamped Peace of God sentiment along with a few roses and a ribbon bow (these were from my stash).


Stamp Sets:  Winter Blessings (release date 10/16/15), 

Saturday, January 3, 2015

winter ATC frame

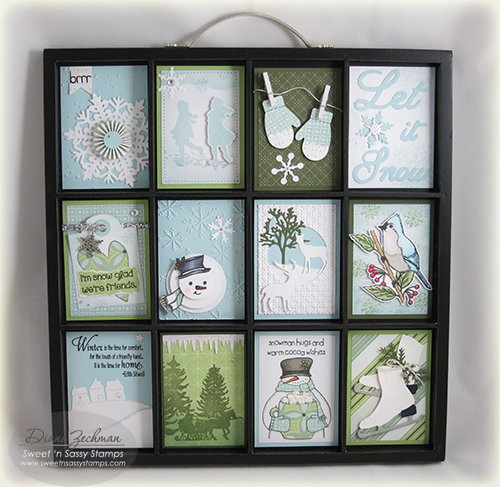
Hello friends! I have a special project to share today that I made for a Christmas gift. I wanted the recipient to be able to enjoy it all winter long, though, so I went with a snowy/winter theme. Each little card in my frame is ATC size (2 1/2 x 3 1/2 inches) and I used lots of my favorite Sweet 'n Sassy stamps and dies.

SNSS ATC frame diane zechman
I wanted to be able to switch out the ATC's for each season/holiday or whatever theme I want...so they were attached in the frame with Removable Glue Dots. I found these to work perfectly for the right amount of adhesion needed, yet still be able to be easily removed.
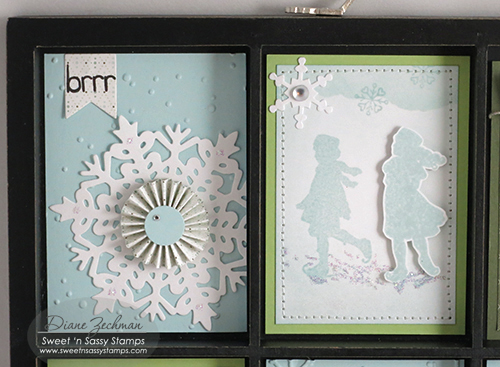
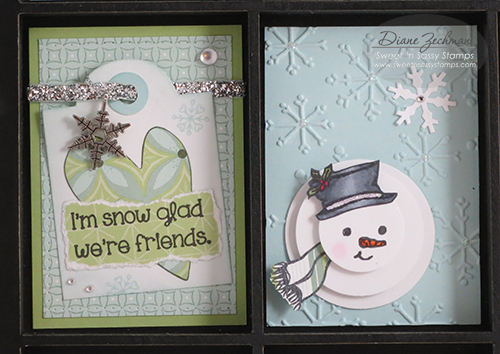
Here's some close-ups of each ATC. For the first one I scored and folded a rosette and centered it onto a Sweet 'n Sassy Large Snowflake diecut. The "brrr" is from my Snowman Soup stamp set.
The second one has some stamped skating friends from the SNSS Winter Silhouettes stamp set, with one popped up for dimension. There's a few tiny snowflakes from my Snowy Hello stamp set lightly added to the top. The edges of this one were stitched on my sewing machine.
SNSS ATC frame 2 diane zechman
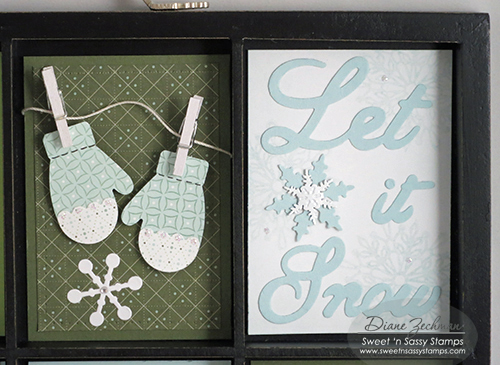
The mittens were made with a punch I had and the white tiny clothespins came from Michael's.  Crochet thread was perfect for the string.  I faintly stamped snowflakes in the background of the Let it Snow words from the Spectacular Snowflakes stamp set.
SNSS ATC frame 3 diane zechman
On the left, below, I used one of the Bookmarks & More dies to create a tag. The heart was cut from the Heart dies and the tiny snowflakes and words are from my Snowy Hello set.
On the right, 3 circles were punched and popped for dimension. The snowman's face, hat and scarf are from the Warm Hello stamps.
SNSS ATC frame 4 diane zechman
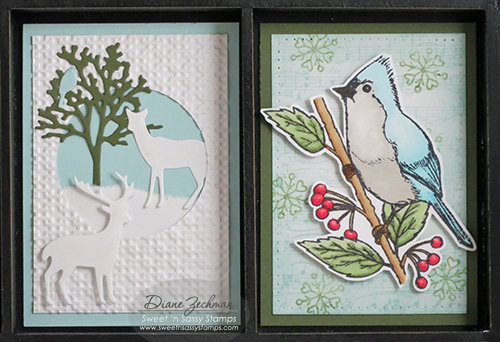
The tree, deer, and bird, below are from Forest Silhouettes dies. On the right, I lightly stamped the Music Background. More Snowy Hello flakes were stamped (this time in green) and the bird from Peace of God was popped up.
SNSS ATC frame 5 diane zechman
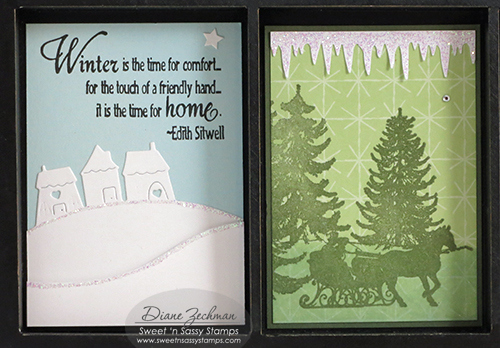
The Hillside Edges dies made a cute snowy scene and the words from Winter Silhouettes went with it perfectly.  For the next one, I stamped the sleigh ride image from one of my fave Christmas sets, Old Fashioned Christmas.
SNSS ATC frame 6 diane zechman
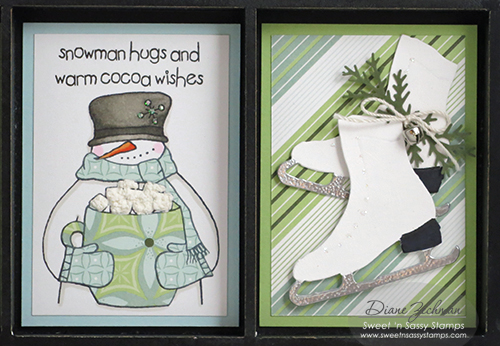
The words and snowy fella below, drinking hot cocoa, is from my Snowman Soup set. The mug, scarf, and mittens were paper pieced. Then I applied a Puffy Velvet Fabric marker (like Liquid Applique) to the marshmallows and heat them with a heat tool to puff them up.
The skates are a die I had. The blades were heat embossed with silver e.p. and the branches, along with a tiny jingle bell, finished them off.
SNSS ATC frame 7 diane zechman
Lots of glitter and bling were added to each one to make this frame sparkle!
Have a great start to the New Year...thanks for popping in! 
Here are the Sweet 'n Sassy products that I used...
♥ Diane

Saturday, November 29, 2014

I thank God for you.


Good morning!

Jessica here with a card to share with you today that I made using the new Scripture & Sentiments Companion stamp set along with the lovely Peace of God stamp set.


I chose to go with shades of blue and accents of white for my CAS card.  Korin's bird images are gorgeous colored in with a variety of mediums but they are also lovely stamped in colored ink because of the fine details included in the stamped image.  I added a bit of white liquid pearls to the berries on the image for some visual interest.

I hope you have a blessed weekend!
Jessica

Thursday, September 22, 2011

Altered Art

Hi!  It's Cathy once again, and it's my turn to share an idea here on the Sweet 'n Sassy Stamps Blog!  Something fun and challenging to do is to take something old, something used, or an inexpensive item and transform it into a piece of stamped art.  I thought I would share an idea that's been around for a long time.

This project began with the card.  The lovely titmouse image was released in August and is one of many bird images at Sweet 'n Sassy Stamps...if you like birds, you will need to check them all out!

My card is a CASE of this beautiful Thinking of You card by Linda (AKA morningsun47), the featured Stamper on SCS this past Sunday.  The titmouse image is colored with copic markers.  The layout was kept pretty simple although I did add a few layers and some Baker's twine.

The little Post-It note holder was made from an inexpensive acrylic photo frame purchased at Michaels.  The stamped image slides into the frame where the photo goes.  The Post-It pad is sticky taped to the front of the frame.  A little ribbon loop adhered under the note pad holds a matching, beaded RSVP mini pen.  The pen was made by running a piece of BasicGrey DP through the Xyron and rolled around the barrel of the pen.  A piece of Scor-Tape covered the DP, and this was rolled in tiny mico beads.  Easy-Peasy...but it makes a nice gift set, don't you think?  Hope you've been inspired to try a little altered art for yourself!  Thanks for stopping by and come back again tomorrow for some more inspiration!

Cathy