Showing posts with label water coloring. Show all posts

Monday, June 28, 2021

Just a Note


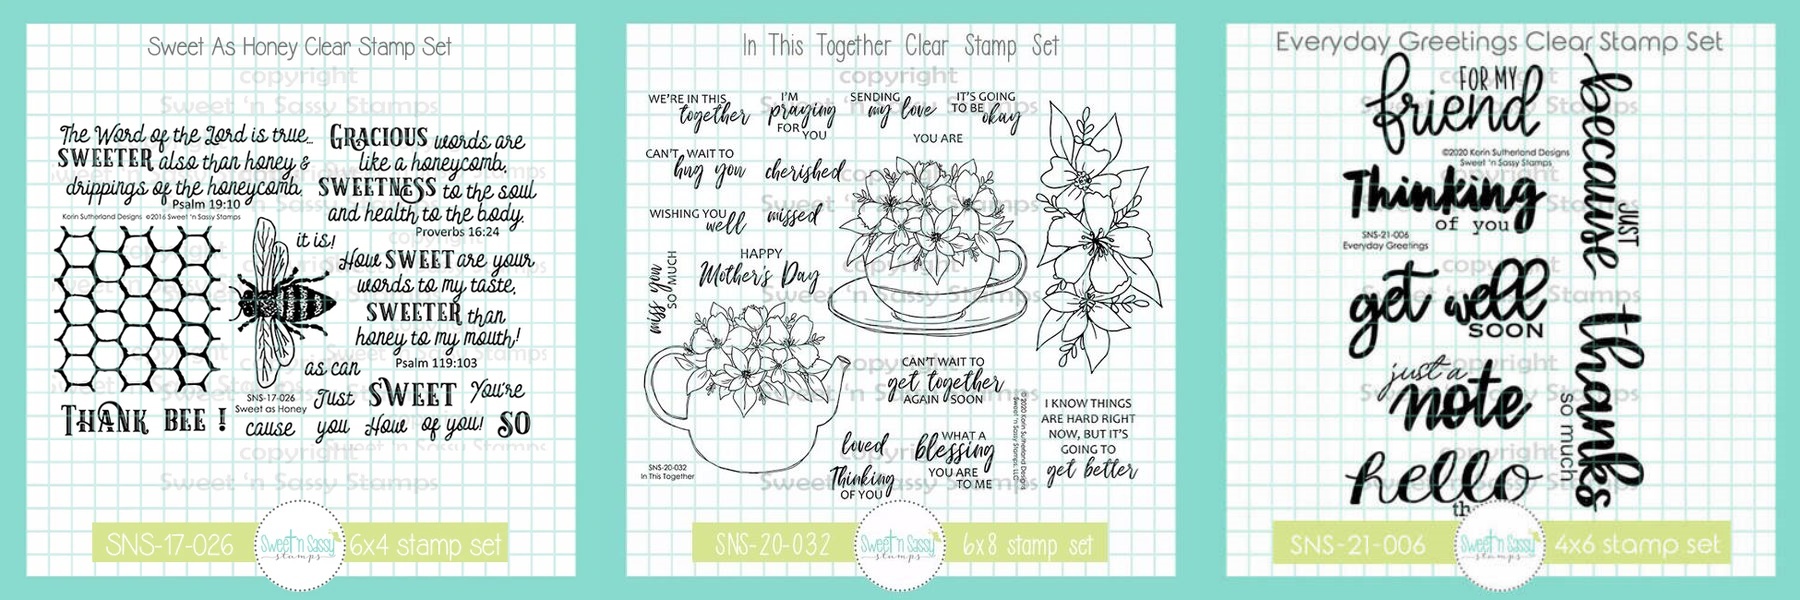
Esther here today sharing a bee themed card. I started by watercoloring the top left part of mix media card front with watercolor paints from Zenacolor. Next I stamped the honeycomb design from Sweet as Honey in Tumbled Glass Distress Oxide (Ranger), and added a few white paint splatters. To finish it off, I added a sentiment from Everyday Greetings and embossed the entire panel with the Organic Lined 3D embossing folder from Altenew. 

The bees and flowers (In This Together) were stamped in Versafine Clair Nocturne Ink  and colored with Arteza Real Brush Pens. I stamped, colored, and popped up an extra flower in the center of my arrangement for a bit more dimension.

    ~~~This post contains affiliate links at no extra cost to you~~~

Tuesday, June 1, 2021

Versatile Botanical Branches

 Hello, Hello! 

Happy Summer to all of you! 

Have you checked out the new release from Sweet n Sassy Stamps?!  This is a seriously awesome release!  My favorite set is the new Botanical Branches by Nina B.  First off, they are just gorgeous; but second, they are so versatile!  They are perfect fillers for floral sprays but they can also stand alone on a card, as in my first card~


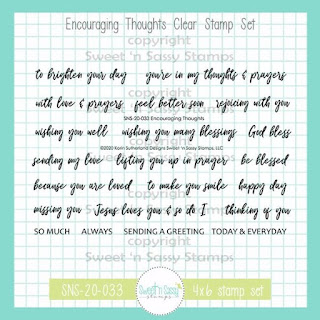
 This gorgeous berry branch was colored with Copics and then fussy cut out.  I added an embossed panel to my card base.  Then, for interest and another pop of yellow, I cut in half a square die cut frame I had in my stash.  It happened to be stamped with an image from the Flower Garden Stamp Set and watercolored with distress ink.  The square halves were adhered to the base and the berry stem was popped up on foam tape.  The sentiment, which is from the Encouraging Thoughts Stamp Set was stamped on a sentiment strip and adhered, along with a few sequins to finish the card. 

Next up, I have used the Botanical Branches set as filler for a floral bouquet.  The flower is from the True Beauty Stamp Set.  


I started with the back panel- color blocked 5 wide stripes with watercolor.  While that was drying, I stamped the flower with distress ink and then colored it with distress inks.  I did the same for the leafy branches that are from the Botanical Branches Stamp Set.  The leaves were heat embossed in white embossing powder on vellum and everything was fussy cut out.  The elements were assembled in the lower left corner and adhered to the card.  The sentiment is from the Birthday Wordfetti Stamp Set and was stamped on blue cs.  A few sequins were added.  

You can check out the entire new June Release HERE!  And check out the new release specials while you are there.  

Thanks for stopping by!

Lee Ann  


Tuesday, May 18, 2021

Lemons and Lettering

 Hello!  

Have you been enjoying Customer Appreciation Month?  Sweet n Sassy Stamps has such talented artists.  

When I think lettering, Rebecca Rios pops into my head!  I love her calligraphy and sentiments.  Life and Lemons is one of my favorites of hers~


Rebecca's letters are exquisite and because of that you can keep your card fairly CAS and the lettering alone will make it shine!  But this lemon though...I love this stylized lemon.  It was stamped on watercolor paper and colored with Ken Oliver Colorbursts.  It was then fussy cut out.  The card base was stamped with the same lemon and leaf, only this time it was stamped randomly in light gray.  A couple of white panels set the lemon apart and lastly, the sentiment is stamped.  a few sequins finish off the card.  

And I cannot forget one of her newest sets, Count Your Rainbows with coordinating dies.  This is such a fun set!  I needed some thank yous for some students at school; this was the perfect set.  I made simple 3 x 3 cards using the smallest rainbow and coordinating die, along with one of the cloud dies.  


The rainbow is colored with Copics and the sentiment is heat embossed on black cs.  The sentiment is from the Scripty Thoughts Stamp set

Rebecca's sets are currently on sale through May 20th, so now is the time to stock up!  


Thank you for stopping by! 

Have a blessed week!

Lee Ann  

Tuesday, May 4, 2021

From Fish to Flowers

 Hello Friends!  

We are having some fun this month celebrating the artists here at Sweet n Sassy Stamps.  This week our focus is on Jenn Nilsson fabulous stamp collection!  Jenn's sweet, whimsical style are right up my alley.  Her set, Country Garden, is one of my favorites.  


This gorgeous image was stamped with Memento Tuxedo Black ink and colored with Copics.  I then fussy cut the image out.  I got some new embossing folders- they seem to be making a comeback and I was in need of new!  I watercolored a piece of cs and let it dry.  Next, I spritzed the inside of my embossing folder with water and then ran the watercolored paper throught the Big Shot.  What a lovely surprise I got with the fun texture and color variation on the panel.  I die cut a circle from the purple paper and used it to back the image.  

The sentiment, from the Precious Poppies Stamp set -was stamped in the corner of the card front.  A white scalloped frame was added to the card front, then the purple circle and image were added, along with a bit of grass made with the Tall Grass Die were adhered to the card.  

Next up, a super cas card in which the darling fish does just fine standing on its own! 


Mr. Puffer is from the Fin-tastic Friends Stamp Set.  He was colored with Copics and fussy cut out.  
The background was done with an embossing folder and distress ink.  I used several techniques to get the background the color I wanted.  I started with some base color by sponging on various blue shades of distress inks.  Next I inked up the inside of the embossing folder, spritzed the folder and then placed the sponged cs in and ran it through the Big Shot.  I got wonderful, wavy dimension, but I still wanted more color so I watercolored with distress inks, following the curvy, embossed lines.  I love how this turned out.  The sentiment worked out so well in how it followed the curves of the 'waves'.  A few sequins were added and done! 
And because we are celebrating Jenn's art this week, all of Jenn's stamps are on special this week, 
buy 2 get 1 free (limited to stamps on hand).  


This is an awesome sale to take advantage of!  

Thanks for stopping by!  

Lee Ann  


Thursday, April 29, 2021

Road Trip

 Hello Friends!  

I have another desert scene, this time in the form of a road trip!  I combined the two sets, Just Married and Thirsty Soul to create this card.  


I made this with my niece in mind, who is ready to start life as a new RN.  
The VW Beetle was stamped with Memento Tuxedo Black Ink.  I used post it notes to mask off the heart banner and Just Married sign in the back window.  The car was colored with Copics and fussy cut out.  
The cacti were also stamped and colored with Copics,  I stamped the tall Saguaro in varying heights and with various limbs to create a realistic desert of Saguaros in different sizes.  They were fussy cut out as well.  
The background was done with Daniel Smith Watercolors on Arches water color paper.  I had the desert, road and tall mountains in, then decided to add foothills to the mountains using the mountain stamp from the Landscape Silhouettes Stamp Set.  This is where things were almost ruined.  I selected the wrong colors of Distress Inks and then the paper got too wet.  Once the paper was completely dry, I went back in and brushed in a darker color (and I don't even remember what color I used) and this gave the illusion of shadows on the foothills and saved the background. 
The sentiment is from the Inspirational Word Art 1 Stamp Set and was stamped with Versafine Black Ink using my MISTI so I could stamp multiple times and get good coverage, even on the textured watercolor paper.  

Thanks so much for stopping by! 

Lee Ann  


Monday, April 26, 2021

Morning Glories Two Ways

Esther (from Shoregirl's Creations) here today sharing two cards using the Sympathy Morning Glories stamp set.


This first card is a one layer card with the morning glories stamp around the edges of a watercolor panel in  Versafine Clair Nocturne Ink. I then used a dabbing method to watercolor the flowers and leaves. (I dabbed on two colors of watercolor paint and used a wet paint brush to spread the color around.) After my paints were dry I added some text using the Typewriter Text Background  stamp and black soot distress ink. I then splattered the piece with white acrylic paint. The final step was adding a sentiment from the Timeless Hymns stamp set and a few black jewels. 


My second card is a clean-and simple card with lots of fussy cutting and paper piecing. 


To color my image I created two ink smooshed backgrounds (on mix media paper) using dusty concord and worn lipstick distress ink for the first and shabby shutters and rustic wilderness for the second. I stamped the morning glories on the first one and the leaves and stems on the second. Next I fussy cut all the flowers and leaves, and stamped a third image stamped in Versafine Clair Nocturne Ink on white card stock. I glued the leaves down first and popped up the flowers with foam mounting tape. I fussy cut around this third image and added a bow using purple burlap string.

The black background was embossed with Swirl Motif 3D embossing folder from Altenew, and I stamped the sentiment in Yeti ink from Lawn Fawn. 

 ~~~This post contains affiliate links at no extra cost to you~~~

Tuesday, January 5, 2021

Roses are Red and So are Penguins!

 Hello Friends!  

I hope everyone enjoyed Christmas, New Year's and time off with your families.  

As you have probably already noticed in stores, we are headed full speed towards Valentine's Day.  I got this wacky idea (trying to think outside the box, lol) that I needed a red penguin on a Valentine's Day card.  Here is the end result!


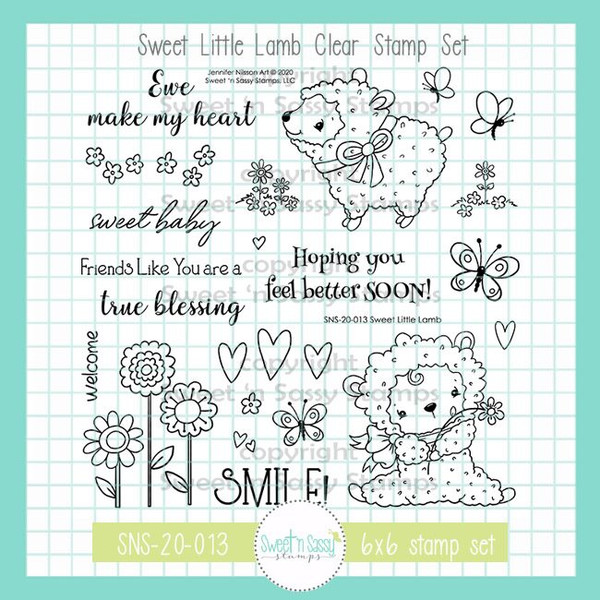
So, I kind of love him!  I did add a heart to his tummy- I used a heart stamp from the Sweet Little Lamb Stamp Set.  This sweet guy is from the Winter Hugs Stamp Set, as is the sentiment.  He was colored with Copics and then fussy cut out.  I was a bit stumped from there.  Several different backgrounds, layouts, and color schemes later, I was still without anything but this cute bird.  I rifled through some patterned paper and happened across this pink and red graphic paper that is perfectly 'Valentiney'.  Best part is it already had the heart shape die cut from it from some previous project.  It was the perfect way to finish off this cutie.  I added some sequins and stamped Happy Valentines Day on the side- the stamp I used is from the Lots of Love Stamp Set.  I tried to get a picture here, but with bad lighting due to a very dreary day, I could not get a good photo of the inside of the card.  Here are both stamp sets that I used~


This next card is also monochromatic red and it started out as a Valentine's card as well, but as you can see, it did not end up as such.  


Isn't this just the best bird image?!?!  If you like realism (like me!) then this is THE bird image for you.  This guy is from the Singing Praises Stamp Set.  I stamped him with Versafine Onyx Black Ink using my MISTI and then water colored him with my well loved Ken Oliver Colorburst Watercolors.  The bird was fussy cut out.  

For the background, I decided to use the faux water coloring technique.  The floral image is my favorite in the Flower Garden Stamp Set.  Once the background was dry, I die cut a circle out of it and them popped up the negative panel on the card base. I stamped the sentiment and added a few sequins and called it done.  If you want to see my inspiration for this card, head over to my blog!  

Please excuse the photos, all.  I am still getting used to a new computer, new editing program and trying to take photos with my phone.  I will get there eventually!  
Don't forget, the January Release Bundle is available through January 9th- you can save over 10%!  
And with your purchase of $75 or more you get free shipping!  AND, with a purchase of $60 or more, you get the January Stamp of the Month- Happy Mail- for free!  


That's a lot of free! 

Thanks so much for stopping by and have a wonderful week!

Lee Ann  

Tuesday, November 17, 2020

Poinsettias for Christmas

 Hello, Hello, All!  

Today I am revisiting the gorgeous Poinsettia Greetings Stamp Set.  This is a favorite of mine that I reach for again and again.  

I like to make my parents a special card for Christmas so given the popularity of the slimline card, I decided to go that route.  I used two shades of red Ken Oliver Color Bursts to color this monochromatic card.  


I started out with a 10 x 4 inch piece of Canson Watercolor Paper.  I spritzed it with water and sprinkled on some Alizerin Crimson Color Burst Water Color Powder.  I used a large brush to move the color around and add water where needed.  I also sopped up some of the color with a paper towel as I did not want it too dark.  

Next, using my MISTI, I Stamped the poinsettias 3 times.  I then painted them all, using the Alizerin Crimson as well as Cadmium Scarlet color bursts.  A little mixture of black, blue and purple color bursts was used for the shadows.  The panel was then cut down for a 8.5 x 4inch card.  

When the flowers were dried, I used Winsor and Newton white gouache that was watered down to make splatters.  The flower centers were filled in with a Uniball Signo white gel pen.  

The sentiment is from the Holiday Greetings Stamp Set.  Both the sentiment and the image panel were matted with shiny gold wrapping paper.  Some sequins finish it off.  


Thanks for stopping by!  I won't be back on the blog 'til December so have a Happy, Happy, Thanksgiving!  

Lee Ann  

Tuesday, July 21, 2020

Mixed Media and Garden Flowers

Hello Friends!

Today's post is all about using background panels and scrap pieces of panels that I have had in my stash.  I paired these panels with various different images from the Flower Garden Stamp Set.  As you will see, you may not even recognize that the same stamp set was used in each card.


First up, nothing says summer like a beachy/sea themed card!  I love this mermaid from the Mer-Mazing Stamp Set.  She was stamped on Neenah Solar white cs and colored with Copics, then fussy cut out. And that crab!  I love this crab!  He is the cutest!  Colored and fussy cut as well.
I used a water color panel that was done with water color paper and Ken Oliver Color Burst Powders.  I used the water colored panel as my base and then built upon that.
For the image panel, I sponged some Salty Ocean Distress Ink onto the panel and followed that up by using a circle stencil and sponging Mermaid Lagoon ink.  Finally, the seaweed.  It is actually from the Flower Garden Stamp Set; as soon as I saw this image I knew I wanted to use it for an underwater scene.  The seaweed was stamped with Memento Tuxedo Black ink and quickly colored with Copics.  The sentiment was stamped using my MISTI, in Versamark Onyx Black Ink.
I popped up the top half of the mermaid and the crab on dimensional adhesive, added some sparkle to her and added Glossy Accents to his eyes.  A few sequins finish it off.

Next up, a simple card with NO coloring.


No flowers here; this time I stamped the bitty butterflies from the Flower Garden Stamp Set and fussy cut them out.  They were grounded with a black cs circle and a white cs strip.  The sentiment is from The Future Stamp Set and is heat embossed in white ep.
The background panel is one I created with when crafting with a friend; I had just received some new Distress goodies in the mail and went to town spritzing and spraying.  I love how this panel turned out.  It was the perfect panel for this card.   Sequins added to the butterfly bodies finish the card.

Lastly, a pretty straight forward, floral card~


These whimsical flowers screamed for bright colors!  I pulled out a coloring medium I had not used in a long, long time.  I stamped the image on water color paper and colored them with Inktense Water Color Pencils.  They really popped on a background panel that was done with Distress Sprays.  I fussy cut the flowers out and popped them up on dimensional adhesive.  I added some strips of white cs (per the CASE This Sketch sketch) and added my sentiment, which is from the Mason Jar Bouquet Stamp Set.
That's it for me!  3 background panels used, same Flower Garden Stamp Set used, resulting in 3 very different cards!
I hope I have inspired you; thanks for stopping by!

Lee Ann 

Saturday, July 11, 2020

You're in my thoughts


Hello everyone! Today I want to show you a card I made with the Sympathy Morning Glories stamp set.


I stamped the image on watercolor paper and colored it with watercolor markers. I stamped a message from the Encouraging Thoughts stamp set. A great match with this image! I distressed the edges of the image and added a blue background paper behind it.
And of course a couple of sequins to finish the card ;).

https://www.sweetnsassystamps.com/sympathy-morning-glories-clear-stamp-set/

https://www.sweetnsassystamps.com/encouraging-thoughts-clear-stamp-set/

I hope you're inspired to create!
- Lucinde

Saturday, May 16, 2020

It's Going To Get Better

Hello Sweet 'n Sassy friends! The last few months have been hard for all of us. Nothing is the same, but I have faith that it is going to get better. I have been making lots of encouragement cards. The new set, In This Together, has so many wonderful sentiments and images that are perfect for creating that special card to let someone know you are thinking of them.


I stamped the image with Ranger Archival black ink onto Canson XL watercolor paper. I colored with Altenew's Spring Garden Watercolor Brush Markers (moss, warm sunshine, autumn blaze, sea breeze) and fussy cut out. I die cut the layering pieces, stamped the sentiment in black ink and assembled as seen popping up the oval piece with foam tape. I felt like it needed a little something more and dug out my sequins for a little bling.


Thanks for stopping by and happy stamping!

Karen

Saturday, May 2, 2020

Prayed For You

Hello Sweet 'n Sassy friends! I am sharing a card I made for the May Sweet 'n Sassy VIP Group Things with Wings challenge on Facebook. We would love to have you join us and play along!


I started by heat embossing the butterfly, from the brand new set Begin Again, onto mixed media paper with Versamark and black embossing powder. Then, I colored the image using only one color, an Arctic Blue Arteza Real Brush Pen and fussy cut out. I die cut the white panel and stamped the sentiment with black ink. I matted the white panel on black, attached to the card base and popped up the butterfly with foam tape.


Love this set!!


Thanks for stopping by and happy stamping!

Karen

Saturday, March 7, 2020

Sweet Baby Cards

Hello Sweet 'n Sassy friends! Today I'm sharing two sweet baby cards I made with the darling new set Sweet Little Lamb.  For both cards, I used the smaller images in the set and a technique called popping pastels to create the colored panels. If you are unfamiliar with popping pastels, all you need to do is stamp images with versamark ink onto white cardstock then rub chalk pastels over the top using cotton balls (rub the cotton ball onto the chalk then on the cardstock). The images you stamped will magically pop darker than the rest of the cardstock. I love this oldie, but goodie technique!

For my first card, I used our very own Julee Tilman's Mojo Monday 532 sketch.  I stamped the lamb on canson xl mixed media paper with versafine clair nocturne ink, colored with Arteza Real Brush Pens (ginger, rouge pink, ash black, smoke gray, wisteria purple) and fussy cut out. I stamped the words using the same ink onto white cardstock, cut with a circle die and stamped the small hearts with purple ink. I embossed the white panel with a dot embossing folder. Then, I attached the purple panel to the white panel, positioned ribbon and attached to the back then adhered the panel to the purple card base. Next, I positioned and popped up the sentiment and lamb with foam tape. As the final step, I tied a small piece of of ribbon towards the top of the card.


For my second card, I used the same paper and ink. I colored the image with Aretza Real Brush Pens (ginger, rouge pink, ash black, smoke gray) and cut with a circle die. I stamped the words, then adhered the heart panel, gray and pink pieces to the gray cardstock base. Finally, I popped up the lamb with foam tape.


Thanks so much for stopping by and have a fabulous day!

Karen

Tuesday, February 18, 2020

Mixed Media, 3 Different Ways

Hello Friends! 

Today seemed like a good day to try something a bit different.  There were lots of bits and pieces on my desk- colored images, monoprints, and various other backgrounds.  I thought it would be fun to put some of these items to use and create mixed media cards.
 I think a lot of us have a certain idea of what mixed media is in our heads- lots of texture, layers, and lots and lots of products- sprays, pastes, metal items, tissue paper, pencils, crayons, gel mediums to name a few.  However, in the card making world, many consider a mixed media card to be two or more mediums on a card. 
So, here we go.  I have 3 different cards, varying in complexity and using different mediums. 
The first is super CAS!


The two mediums are watercolor and acrylic paint. 
Here is the how to~
The background panels are from a single monoprint using acrylic paint and a stencil.  If you are not familiar with monoprinting, it involves using a gel plate like the ones here.  Acrylic paint was dropped on and rolled out with a Printing Brayer.  The leaf panel is two stamps- the leaf is from the Autumn Splendor Stamp Set and the doodled square is from the Just Be Stamp Set. I stamped and masked the leaf onto water color paper, then stamped the square.  The image was then watercolored with Ken Oliver Color Bursts and fussy cut out. I doodled lines around my background panels using a Sakura Pigma Micron Pen.  Some acrylic paint splatters finish off the leaf image. 
The next card has a bit more going on~


The flower, which is from the Mason Jar Bouquet Stamp Set, was stamped with Versafine Onyx Black Ink on water color paper, painted with Ken Oliver Color Bursts and fussy cut out.  The background is stamped multiple times with the floral branch from the Birds and Blooms Stamp Set and colored with Prismacolor pencils.  I added dies cuts from a new die I was trying out and heat embossed a sentiment from the Singing Praises Stamp Set.   
This third card is what you may consider to be a more traditional mixed media project.  It was inspired by our own Julee Tilman! 


I had another flower laying around, wanting to be used on a card.  It was stamped on watercolor paper with Versafine Onyx Black Ink , water colored with Ken Oliver Color Bursts and then fussy cut out.  My mixed media panel was one I made when trying to replicate something that Julee had made.  Well, mine fell really short!  I was going to toss it, but, when placed next to the color orange, it suddenly came to life.  I also had a piece of patterned paper that had been spritzed with a couple of different shimmery sprays; the colors worked perfectly with the orange rose and the teal panel.  The sentiment is from the new, Sentimental Mash Up Stamp Set.  This card uses water colors, sprays, embossing paste and distress oxides. 

There you have it, 3 mixed media cards, all with very different looks.  Which do you like best? 
I hope I have inspired you to get messy today!

Thanks for stopping by and have a blessed week! 
Lee Ann 

Monday, February 10, 2020

Shape Cards & Birthdays


 Hello everyone! Today I'm sharing two fun cards featuring three newly released Sweet n Sassy stamp sets! For my first creation I decided to make a mini shape card using the Springtime set. If you look closely you'll see a bit of white ink smeared on my black circle to create a chalkboard effect.  (The second photo shows it up better.)

~~~This post contains affiliate links at no extra cost to you~~~
Supplies and tools:
  • Springtime (Sweet n Sassy Stamps)
  • Canson Mixed Media Paper
  • Sonnet Water Colours
  • Prismacolor Pencils
  • Petals and Blooms Paper Stack (The Paper Studio)
  • Teardrop Circles Dies (Spellbinders)
  • Circle Nestabilities (Spellbinders)
  • Small Scallop Circle Nestabilities (Spellbinders)
  • Crochet Dies (Sizzix  - Tim Holtz)
  • Christmas Quilt Embossing Folder (Couture Creations) 
  • Brilliance Moonlight White Ink (Tsukineko) 
  • Versamark Watermark Ink
  • White Embossing Powder
  • Black Embossing Powder
  • Baker's Twine


My second card is a bright and cheerful birthday card using both the Birthday Borders and Sentimental Mash-Up sets. I used gel pens to color in my confetti - just to make it a little more fun and exciting looking! 


 Supplies and tools: