Showing posts with label Large Snowflakes Die Set. Show all posts

Monday, October 10, 2022

Snowstorm


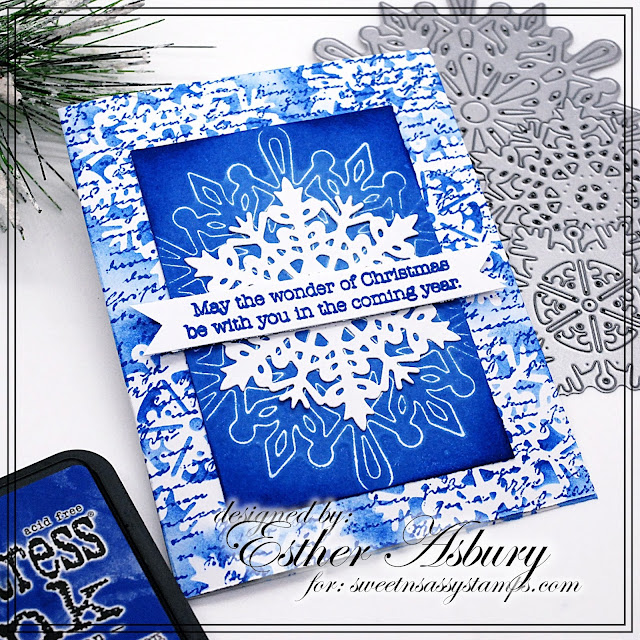
Esther here today sharing this frosty winter card that uses the BRAND NEW Snowstorm stencil. 

To create my card I pressed Versamark watermark ink through the snowflake stencil on mixed media paper, removed the stencil, added white embossing powder, and heat set. Next, I used Prize Ribbon distress ink to do some ink smooshing and then inked the edges with Chipped Sapphire distress ink. I added the largest snowflake from Large Snowflake dies set and then a die cut sentiment over that. 

Click here to shop the entire October Release.

 ~This post contains affiliate links at no extra cost to you~~~

Supplies and Tools:


Monday, July 11, 2022

Christmas SALE!!!


Esther here today with a Christmas card all done up in classic blue and white. I used chipped sapphire distress ink for all my stamping and even colored the die cut heart and background matting with it as well.This week is our annual "Christmas in July" sale with all the Christmas and winter themed items 20% off using coupon code: festive22. 

Click here to go the Christmas Sale page.


     ~~~This post contains affiliate links at no extra cost to you~~~

Supplies and tools:

Monday, January 10, 2022

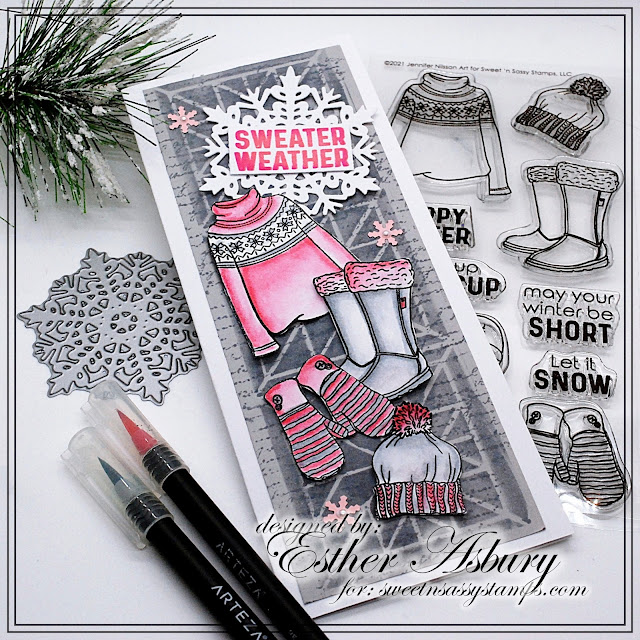
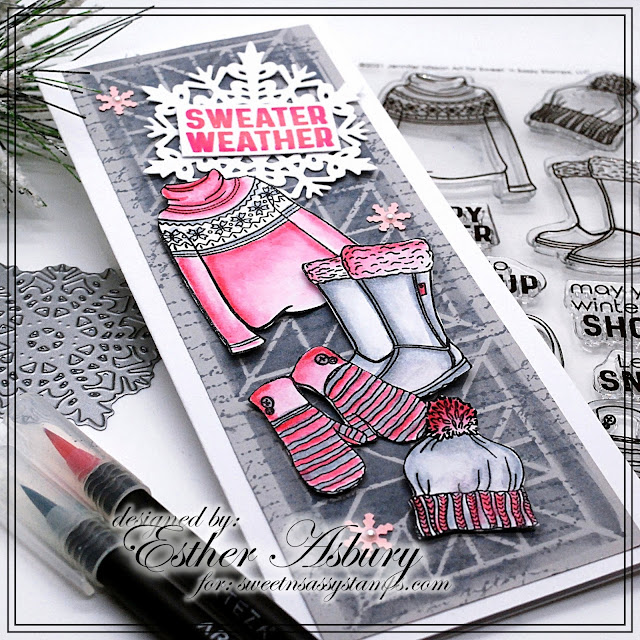
Sweater Weather


Esther here today sharing this fun winter card. I don't usually do slim line cards, but I wanted a little more space so I could include more the winter wear from this super cute set. 

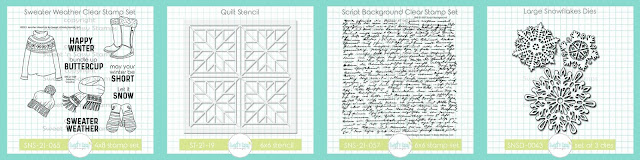
To create my card I stenciled the background using  Weathered Wood Distress Ink from Ranger and the NEW Quilt Stencil. I then stamped the Script Background over top in the same color of ink. 

The images  from Sweater Weather were stamped in Versafine Clair Nocturne Ink  on mix media paper and colored with Arteza Real Brush Pens. 

After die cutting a snowflake from the Large Snowflake Die Set I added a sentiment stamped in worn lipstick and picked raspberry distress ink.  The last step was adding a few tiny  white pearls to my little pink snowflakes.

     ~~~This post contains affiliate links at no extra cost to you~~~

Saturday, January 1, 2022

Sparkle & Shine

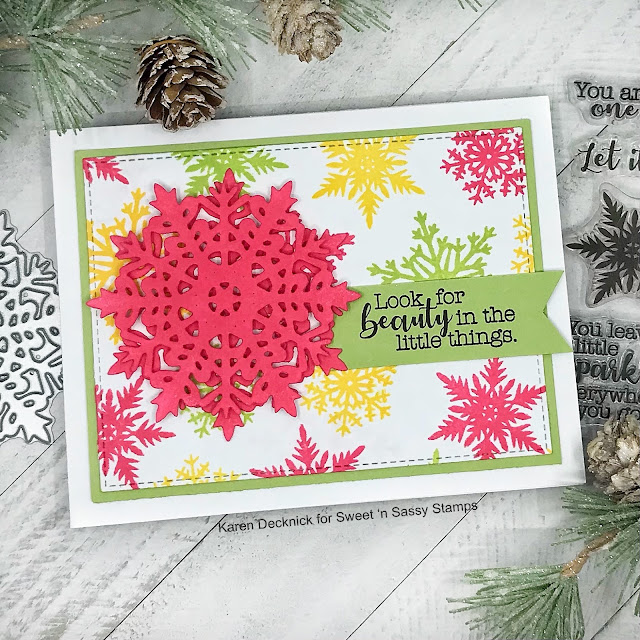
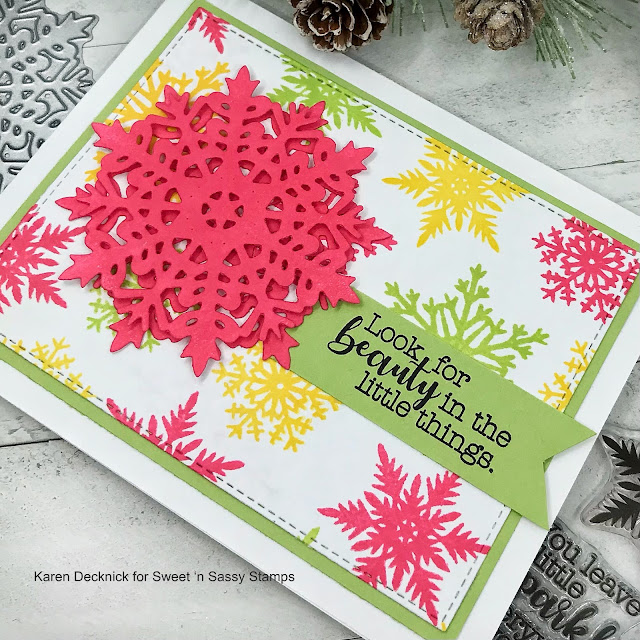
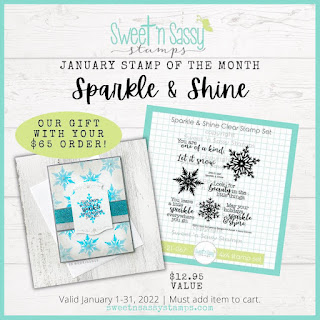
It's a brand new month and that means a new release! Today's card features the new January 2022 Stamp of the Month Sparkle & Shine. I LOVE snowflake stamp sets! In my opinion, you can never own too many of them. 


This card went together pretty quickly. I stamped the three snowflakes on white cardstock with honeysuckle, sprout and buttercup dye inks. I cut the panel with a stitched rectangle die, matted with certainly celery cardstock and attched to a white card base. 

I die cut the snowflakes and decided to ink them up with the honeysuckle ink. I love how it pops! To get some dimension with the snowflake, I took the time to add small pieces of foam tape to the back of one and attached to the other one. I really like how this turned out! I used the same color as the mat for the sentiment strip and inked the sentiment with VersaFine Clair Nocturne ink.


Sparkle & Shine


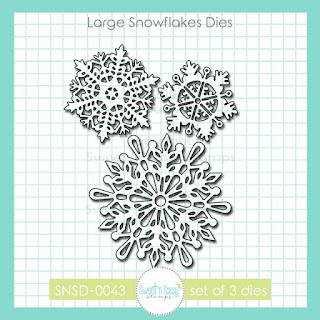
Large Snowflakes Die Set 


I hope you enjoyed today's card and thanks so much for stopping by!

Karen

Monday, November 22, 2021

Snowflake Dies THREE Ways


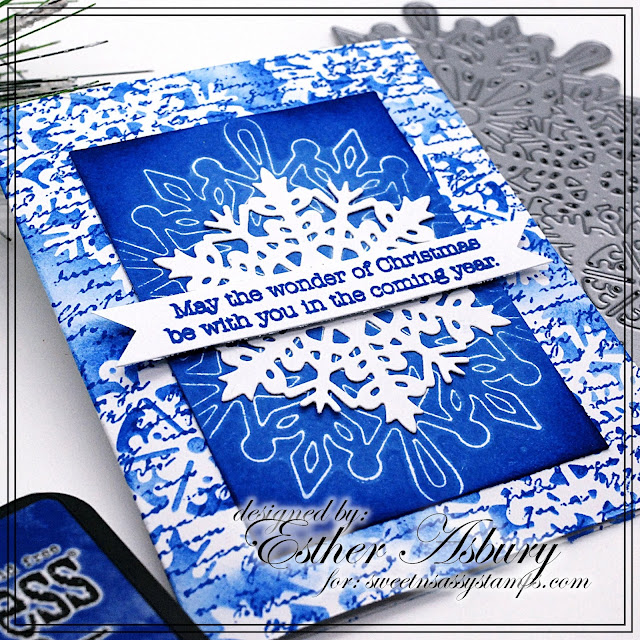
Esther here today with a pretty Christmas card that features snowflake dies used THREE different ways. 

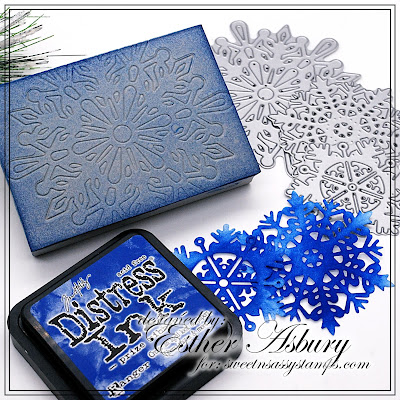
Way #1 To create a stencil --- I cut two snowflakes from printer paper and used them as a stencil on the background.

Way #2 To create an impression on stamping foam ---I heated my stamping foam, pressed it into the largest of the snowflakes to create an impression, inked the stamping foam with distress ink, and stamped it on a piece of white card stock.

Way #3 To create a regular die cut --  Last of all I die cut the medium sized snowflake and glued it over top the reverse print. 

 This week all STEEL DIES and DIGITAL STAMPS 

are 20% off at Sweet n Sassy Stamps.

        ~~~This post contains affiliate links at no extra cost to you~~~ 

  Supplies and Tools:

Wednesday, November 10, 2021

Wish Big

Hi Sweet 'n Sassy friends! It's Julee popping in to share a little inspiration with some stampy goodness. We're celebrating 14 years of Sweet 'n Sassy this month with weekly mini releases + sales!  This week's sale is 20% off stamps in our Backgrounds and Creative Worship Stamps categories. While supplies last, through November 14.

Today I'm going to share a few cards that feature stamps from these two categories. First up is one combining the NEW Script Background (just released on Monday) with my Joyful Day set (new this month), and a previously released Creative Worship set, Old Fashioned Alpha.


I placed the Script Background in my MISTI, then inked up with a rainbow of Catherine Pooler mini inks and stamped. I then went over the stamp lightly with a waterbrush and stamped again to give a little watercolor effect to the script. When this was dry I lightly blended the same color of ink over each color of stamping on the background. The cupcakes are from the Joyful Day set and colored with Copics and then fussy cut.  I then used the Old Fashioned Alpha set to create the wish big sentiment. I finished off with some sequins and bling.

My next card uses the beautiful Creative Worship: Wonder of Wonders set from our October release.  I colored up these rejoicing women with Copic markers, then trimmed around with scissors.  The sentiment from Timeless Hymns is embossed in white onto purple cardstock. I then stenciled the Vintage Doily Stencil onto white cardstock with villainous potion distress ink. 

My third card features the Spectacular Snowflakes set from our Backgrounds category.  I stamped them randomly in versafine clair fallen leaves onto kraft cardstock, then added a little ink blending around the edges.  The focal snowflake is created with the Large Snowflakes Die Set. I die cut the snowflake three times, then layered together for dimension.  I then inked the edges with brown ink.  Next I coated the entire snowflake with versamark ink and embossed with sparkle embossing powder.  This is added to my card with dimensional foam tape for some extra life.  The sweet little tag is from the Mini Tags Die Set, and I stamped the Noel sentiment from Christmas Wordfetti on it, then tied with some string.

Thanks so much for stopping by! I hope you're inspired to create something today.


Saturday, October 16, 2021

A Trio of Christmas Cards

Happy Saturday Everyone! I created some backgrounds a couple of weeks ago using the brand new Warm Winter Friends. I just love the sweet animals and other images in this set! I decided to utilize the flower in the set to create my trio of backgrounds.


For my first card, I created the background by inking up a white A2 panel with ballet slipper ink and then stamping the flower over it with cranberry ink. I die cut the panel and layered it on a lacy edge rectangle die cut. I stamped the rabbit with Versafine Clair Nocturne ink and colored with Altenew Artist Markers. I decided it needed something more, so I added in a white snowflake. 


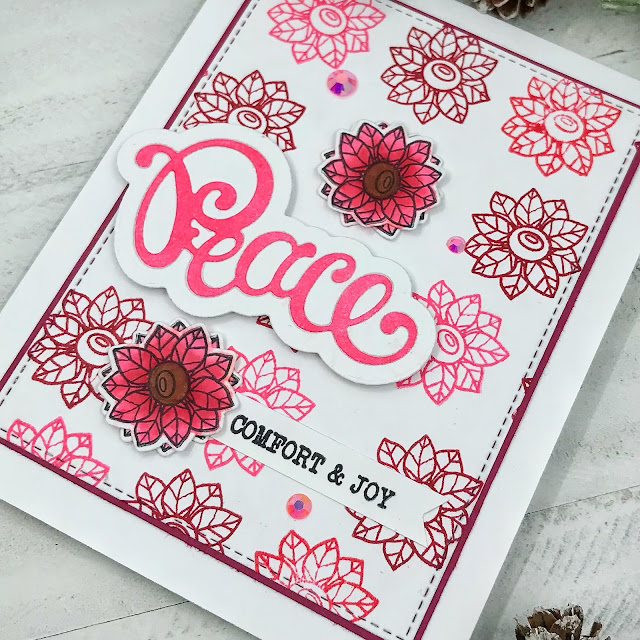
For my second card, I created the background by stamping the flower on a white cardstock panel with festive berries distress oxide ink, honeysuckle and cranberry dye ink. I die cut the panel and cut a mat from purely pomegranate cardstock. I stamped the flowers multiple times on white, colored with honeysuckle and cranberry inks and die cut out. I decided to glue two flowers together to create a bit of depth and texture. 


I started my third background by inking up the white panel with honeysuckle, stamped the flower with cranberry and then stamped the text background over the top in black. At this point, my third background became a hot mess because I decided to use a stencil with white ink over it. In my mind it worked, but in reality it did not.

I did not like it at all, so I took a baby wipe and wiped it off. Now it was very faded and I was at a loss for what to do. I made another oops too, but you can't see it in the photo so we are not going to talk about it. I searched for a layout and decided to utilize an older Freshly Made Sketches sketch challenge. 

I added some white splatters to the panel, cut the panel down to a square and used purely pomegranate cardstock again for the mat and long strip. I used a leftover flower from my other card and added some white gel pen dots to the center to mix it up a bit. Ta-da, I managed to salvage the background! Whew!


Here are the background panels before I turned them into cards. The top panel is the one I added the text script too.


I used the same sentiments for each of the cards and here are pictures of how I did the peace one. I cut a base for each one in white, then nested the die pieces together and cut again in white. Next, I inked up white cardstock in three different colors and die cut just the word peace. Finally, I glued them together as seen in the photos. I decided not to waste the extra inked up cardstock and used some heart dies for future cards.


These cards fit our October Sweet 'n Sassy stamps VIP Group challenge, Think Pink. We would love to have you join us in the group and play along.


Warm Winter Friends

Peace & Joy Word Dies

Christmas Wordfetti

Christmas Text Background

Large Snowflakes Die Set


I hope you enjoyed today's cards and thanks so much for stopping by!

Karen (click my name to follow me on Instagram)

Sunday, September 19, 2021

Snowflakes

Today I am sharing how to get two cards from one technique featuring the Large Snowflakes Die Set. These dies were very popular and sold out. Don't worry, more are on the way and you can preorder yours today.

I LOVE these dies so much! You can see some more of my cards here


I wanted to do something non-traditional so I chose an unusual color scheme. 


I started by inking up a piece of cardstock with shabby shutters distress oxide ink. Then, I die cut a bunch of snowflakes and adhered them with pixie spray. The snowflakes didn't want to stick(this was an experiment) so I laid some heavy books on top for a few minutes and this worked, but I had to be careful. I made sure I was holding onto the snowflakes as I went over the areas carefully with rustic wilderness distress oxide ink. Once complete, I peeled the snowflakes off and went over the entire piece with bundled sage distress oxide ink. I added a sentiment strip and layered snowflakes to finish it off.


After creating this card, I was left with snowflakes that were partially to fully inked up. I got to thinking I could finish inking them and use them to create a background for another card, so that's what I did. I inked them up more using bundled sage and rustic wilderness distress oxide inks. Then I glued them down on white cardstock.


I kept the layout the same as the first one, sprayed the background and snowflakes with a sheer shimmer sparkle spray and created a different sentiment strip to complete the card.


Do you have a favorite? My favorite is the second card.

Supplies:

Large Snowflakes Die Set

Endless Love 

Christmas Pine 

Inks: shabby shutters, bundles sage and rustic wilderness distress oxides, versafine clair nocturne and yeti white pigment ink

cardstock: white and garden green

white embossing powder

Imagine sheer shimmer craft spray  sparkle

Bearly Art precision craft glue


Thanks so much for stopping by,

Karen