Showing posts with label distress oxide background. Show all posts

Monday, October 11, 2021

Rainbow Birthday


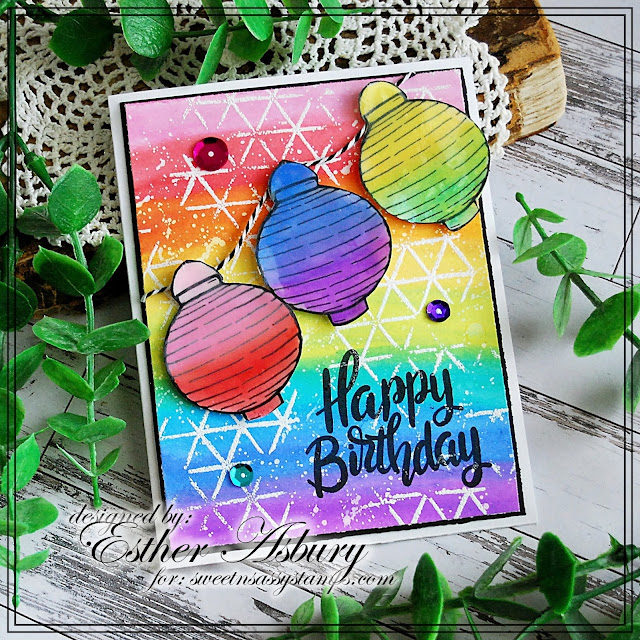
Hello friend, Esther here today with a bright and cheery rainbow birthday card. I started by painting a background with distress oxides on Canson Mix Media paper. (These are the colors in order from top to bottom: Kitsch Flamingo, Festive Berries, Wild Honey(mixed with Festive Berries), Squeezed Lemonade, Twisted Citron (mixed with Salty Ocean), Salty Ocean, Blueprint Sketch, Wilted Violet.) 

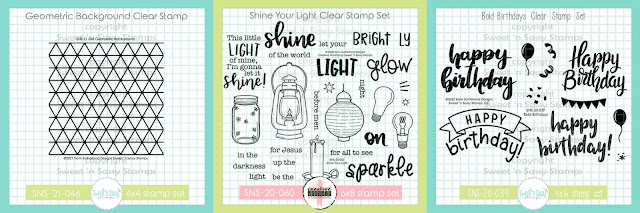
Next I spot stamped the  Geometric Background in Yeti Ink (Lawn Fawn) and embossed it with white embossing powder. I added some white paint splatters to fill in the empty spaces.
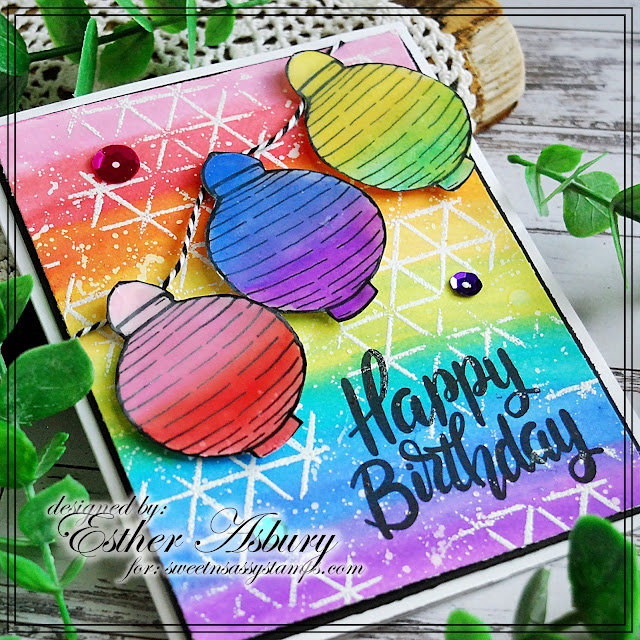
The Chinese lanterns are from the Shine Your Light stamp set, and are stamped in Versafine Clair Nocturne Ink  and painted with distress oxides. After they were dry, I inked them up with Versamark Watermark Ink and embossed them with Clear Ultra Thick Embossing Powder to give them some shimmer. 

Last of all I stamped the sentiment from Bold Birthdays  in  Versafine Clair Nocturne Ink  and added some sequins. 
   ~~~This post contains affiliate links at no extra cost to you~~~

Wednesday, August 18, 2021

Be still and know by Charmaine Canham


 How are you? Are you OK? How are you holding up? Let me tell you, I am not doing well.
The world is on fire, countries are at war,
we are fighting amongst ourselves.
 I had to make myself a card tonight to remind me that
 God is in control. He is almighty, and He's got this. 

Ok, let me tell you how I made these two cards:

The inspiration for this card is from all the noise we constantly hear from the big cities. I chose the Landscape Silhouette stamp set for both cards.


First, I made the background using my favorite combo of Distress Oxides: Black Soot, Chipped Saphire, and Dusty Concord.


Next, stamp Typewriter Text Background stamp with white pigment ink.


 Stamp the city silhouette with black ink, and then clear heat emboss it to prevent smudging. 


Add "stars" with white Copic Opaque paint splatters.


Stamp your sentiment from the Faith Wordfetti stamp set. I then
mounted it on silver Mirror card to play on the silver of the stars.


The next card is made in the same way and with the same stamp sets.
I tried to mimic the "fire" using these distress oxides.


This background is named Psalm 23 background.


Stamp this with a Gathered Twigs Distress Oxide.


I found a Versafine Clair that matched the brown of the Distress Oxide. This is
 also, a nice ink for detail stamping.


I added gold Tonic Mirror cardstock to the back.


I hope you found some comfort today.

Talk soon,
Charmaine


Wednesday, July 21, 2021

Dream Big by Charmaine Canham


Good Morning Flowers! 

I have a quick and fun card to show you today. I wasn't in the mood to color, so I grabbed the next best thing guaranteed to make a big impression!  I just got the Fantastic Flowers stamp set and wanted to play with my Distress Oxide Sprays. Here are the instructions for this happy pairing!

I started with stamping three flowers and clear heat embossing them.
This way, you can easily clean the spray from the black embossed lines. 

Here I used three Distress Oxide Sprays that work well together. Use an old box to spray into and in a well-ventilated area. Alternate the colors, drying them in between spraying again.


Next, stamp the Typewriter Text Background stamp with a dye ink or
 Amalgam ink, like Gina K's, onto the cut-out flowers. This will give the flowers more interest.


For the actual card base, I decided to use a slimline card (8 1/2 x 3 1/2) and spray
that with Distress Oxide spray and Mica Spray for some shine. 


Stamp the leaf stamp with VersaMark and white heat; emboss this. Make sure to use
your antistatic tool and wait for the base to dry.


No card is complete without "bling"! I had an old circular flower die and cut three circles. Glue these to the center of each flower. I then added a gemmed brad to each after piercing a hole through the center with my punch tool. 


Curl and shape the flowers with your hands, and place foam tape under each flower.
Stamp a small sentiment and "hide" it in the folded flowers. 

I hope you enjoyed today's card. Let me know what you think!


Talk soon!
Charmaine 


Wednesday, May 5, 2021

Hope in God by Charmaine Canham

Good Morning, Flowers!

I just received my (new to me) Jennifer Nilsson, Encouraging Peonies stamp set, and I had to ink it up. Sweet 'n Sassy also has a big Buy 2 get 1 Free deal on all of her stamps this week! Make sure to check it out! But let me tell you how I made this beauty!


I started applying the new Distress Oxide color, Salvaged Patina, to half of an  A2 cardstock base. 
 

Make sure this is dry or dried with a heat tool before moving to the next step. Stamp the smallest dots from the Textures Tiles 8 stamp set with Gina K Designs Soft Stone ink pad over the whole card.


I just love these leaves on this stamp set. I heat embossed them with silver powder from Hero Arts and Versamark watermark ink.


The Future stamp set has beautiful and inspiring sentiments. I stamped the sentiment with black Versafine ink, and clear heat embossed. I didn't want to take the chance of it smearing at this point.


I noticed that the leaves disappeared in the background in that beautiful patina color. I pulled out Salty Ocean Distress Oxide and painted the leaves with a small paintbrush. This gave it a soft watercolor look.

 I always want to doodle on my cards. I pulled out my white Posca and Micron pen and started stippling and adding highlights to the leaves. This is probably not recommended, but I pulled out my gray Copic markers and added shadowing under the leaves over the distress oxide. I finished by adding a hand-drawn border and white dots in the darker shadows.


This card transformed so much by adding shadows and highlights organically. I hope you liked my card today, and leave me a comment or a question if you have any.

Remember to check out this week's deal below!
I hope you have a great day!
Charmaine

Follow me for almost daily inspiration on Facebook and Instagram.


Monday, July 13, 2020

Deserts and Bees


Hello Friends, Esther here with two fun cards to share with you! This first one is a desert scene using the Landscape Silhouette stamp set. I inked up the top half of a watercolor paper with pink and purple distress oxides and added some paint splatter stars. Originally I had masked off the moon, but had a little "whoopsie" with my ink so I ended up cutting a large white circle  to cover it up.  It was my first time to use the Landscape Silhouette stamp set, and I'm loving how it turned out!


~~~This post contains affiliate links at no extra cost to you~~~
Supplies and Tools:
  • These Sweet n Sassy Stamp Sets
  • Canson Watercolor Paper
  • Circle Nestabilities (Spellbinders)
  • Fishtail Banners (Stamp Simply)
  • White Acrylic Paint
  • Brilliance Moonlight White Ink (Tsukineko)
  • Jet Black Archival Ink (Ranger)
  • These colors of Distress Oxide (Ranger)
    • Seedless Preserves
    • Dusty Concord
    • Wilted Violet
    • Black Soot


My second card features the BRAND NEW "Bee Sweet" stamp set.


After coloring my beehive I stamped and fussy cut some of the little bees. I then added glitter and  popped them up around my hive with dimensional tape!


Supplies and Tools:
  • Bee Sweet (Sweet n Sassy Stamps)
  • Texture Tiles 4 (Sweet n Sassy Stamps)
  • Canson Mix Media Paper
  • Arteza Real Brush Pens
  • Petals and Blooms Designer Paper (The Paper Studio)
  • Circle Nestabilities (Spellbinders)
  • Large Scallop Nestabilities (Spellbinders)
  • Fishtail Banners (Stamp Simply)
  • Crochet Dies (Sizzix - Tim Holtz)
  • Clear Glitter (Studio G)
  • Peeled Paint Distress Oxide (Ranger)
  • Antique Linen Distress Ink (Ranger)
  • Jet Black Archival Ink (Ranger)


Monday, June 8, 2020

My Anchor Holds


Hello Friends, Esther here with two new cards to share with you.  I'm loving all the masculine stamp sets in this month's release, and this first card features a little scene created with "Peace Be Still" on an ink smooshed background.  I stamped my images on mix media paper and colored them with Arteza real brush pens before fussy cutting and adding them to my card front. For extra texture I added some cheesecloth behind my collage.


~~~This post contains affiliate links at no extra cost to you~~~

Supplies and Tools:
  • These Sweet n Sassy Stamp Sets
  • Arteza Real Brush Pens
  • Canson Mix Media Paper
  • Lighthouse w/clouds (Cottage Cutz)
  • Shells Cutups Dies (The Cat's Pajamas)
  • Ornate Ovals (Divinity Designs)
  • Cheesecloth
  • Jet Black Archival Ink (Ranger)
  • These colors of Distress Oxide (Ranger
    • Broken China
    • Cracked Pistachio
    • Black Soot


My second card features a set from last month called "My Father's House"


For this card I created a fun vintage scene with script and newsprint designer papers from The Paper Studio, die cuts from various companies, and four different Sweet n Sassy sets.


~~~This post contains affiliate links at no extra cost to you~~~

Supplies and tools:
  • These Sweet n Sassy Stamp Sets
  • Kirby Teesdale Paper Pack (The Paper Studio)
  • Canson Mix Media Paper
  • Arteza Real Brush Pens
  • Dotted Ovals Dies (Sizzix)
  • Crochet Dies (Sizzix -Tim Holtz)
  • Callista Rectangle Shadowbox Frame (Spellbinders)
  • Scallop Basic Edges 2 (My Favorite Things)
  • Fishtail Banners (Stamp Simply)
  • Jet Black Archival Ink (Ranger)
  • Vintage Photo Distress Oxide (Ranger)