Showing posts with label faux watercoloring. Show all posts

Wednesday, August 4, 2021

You've been on my mind by Charmaine Canham


Good Morning!!! 
I am all for making unique and one-of-a-kind cards, but sometimes the need arises to make multiples. Well, I have a solution for you! 


I am using the Encouraging Peonies stamp set that is just gorgeous. It has the most
simplest sentiments and can easily be paired with any of these flowers.


Here is what I did:
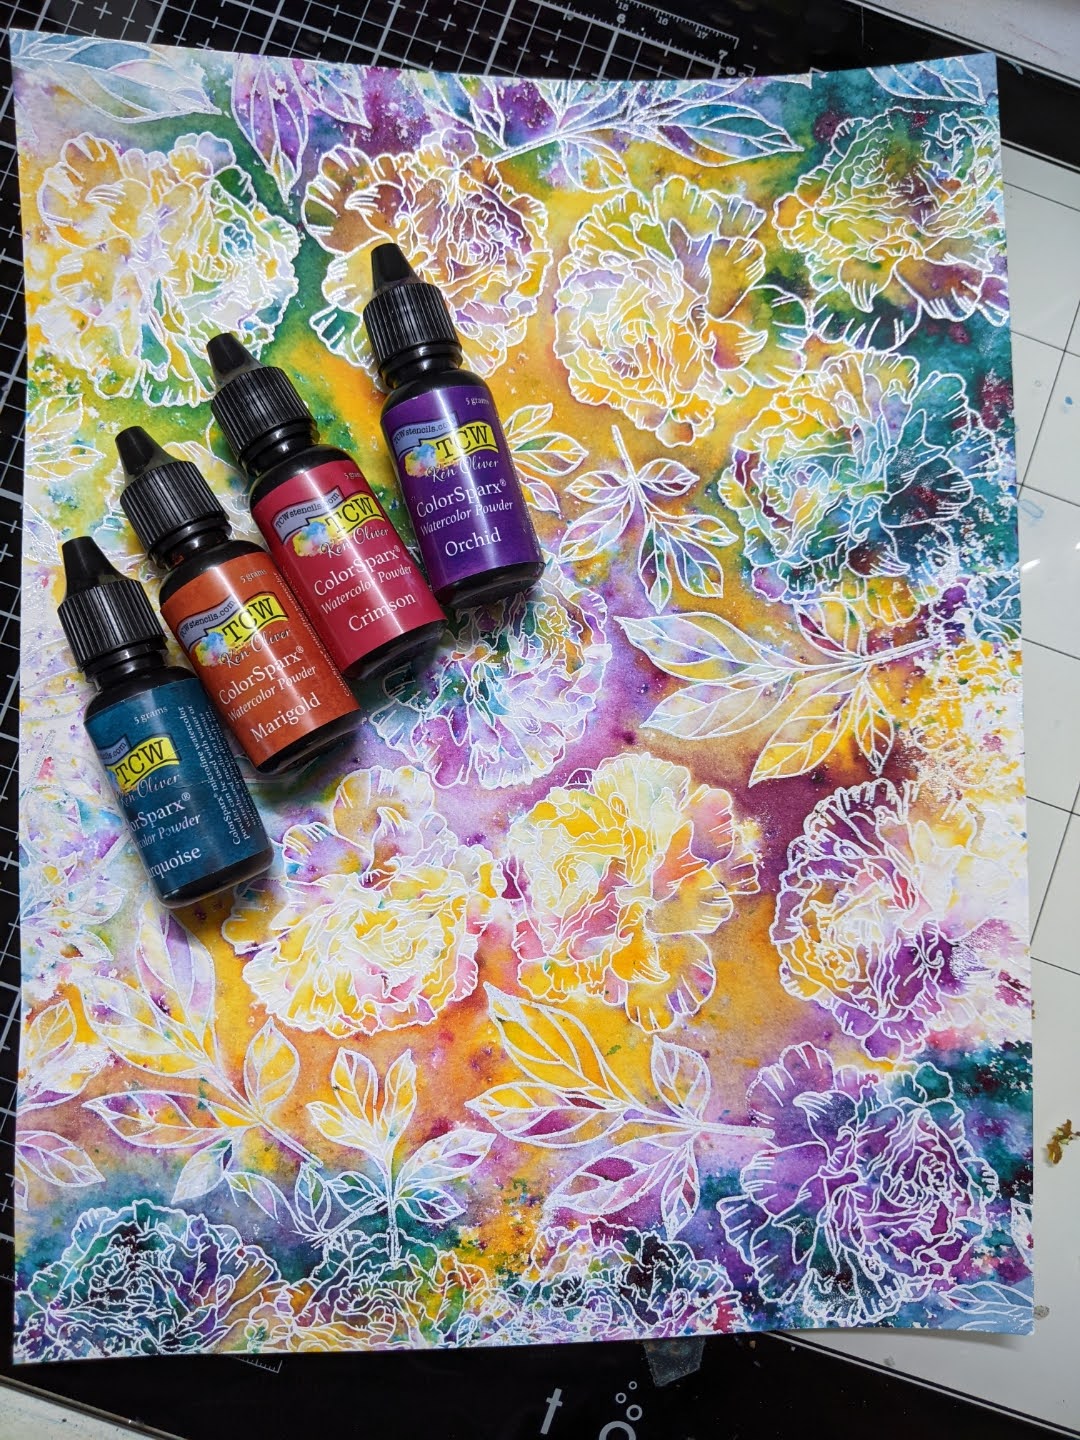
Start with any watercolor paper, like Strathmore, white or clear embossing powder, and Versamark.


Next, randomly stamp flowers and leaves all over an A2-sized sheet. You will need to cut the watercolor paper down as this is a bit larger (or keep it this size, it's not important!)
Make sure to use an embossing buddy before you stamp to not get embossing powder everywhere.

Next, use painter's tape or washi tape and adhere the edges to a waterproof surface. The sheet will buckle when you add water. I am using The Crafters Workshop ColorSparx that comes in packs of three. Use any complementary colors so that you don't inadvertently make mud. 
Wet your paper and start by adding a little at a time.

Add more water to dissolve the pigment. 


You can let this dry naturally or take a dry cloth and soak up all the water. You can also ( I just thought of this!) use a blank sheet of paper and transfer color for another project. If the color is still too strong in some areas, add water and dry it.

Since I am making mini slimline cards, I try to see how I can position my dies (from Gina Marie Designs) to get the prettiest areas onto my card. Run this through your die-cut machine.


Instead of stamping the sentiment on a separate piece of paper, why not try something different and stamp it on acetate?? You will need pigment ink, like Stazon, for it to dry quickly. You can also heat emboss the sentiment!


Once the sentiment is stamped, an easy way to adhere the acetate to the card front is to use brads. Punch holes through both the acetate and card front. Make sure to use double-sided foam tape to "hide" the legs in the back.


Attach the card front to a 6 1/4 x 3 1/4 base for a clean look in the back. Since the mini slimline cards are roughly 6 1/4 x 3 1/4, I still use a top folding A2 base with my pre-printed logo on it. I just cut it down to size. The envelopes I use are #7 (6 1/2 x 3 1/2) and work perfectly. 


And that is it! I use the "friend" die in gold on two cards that matched the brads on the cards. 


I hope you like today's cards and let me know which is your favorite!!!

Talk soon, 


Saturday, February 13, 2021

Encouraging Peonies

 Happy Saturday Stampers!

Michelle here today from East Bay Stamp Chick with some quick and easy cards. I love floral cards and one of my favorite things to do is to stamp the same image multiple times and then color each card panel in different colors or styles. I love to see how the same image looks so different in different colors.


So I stamped and heat embossed in white embossing powder the same image 3 times on watercolor paper. I used the Encouraging Peonies Stamp set.


I absolutely love this stamp set. It is one of my favorites! And it's in the Overstock Sale right now, so it's 20% off!!

To create the faux watercolor look, I used a watercolor powder. There are lots of brands out there. The one I used is called Brushos. Any brand will work. Once you have stamped the image with an embossing ink and heat set an embossing powder you are ready to sprinkle the watercolor powders on your paper. Make sure you use a heavy weight paper like watercolor paper for this. After you sprinkle the powder, then mist your paper with water. I use a small spray bottle from the cosmetic department in Target. Mist as much or as little water onto the paper as you want and watch the powders mix and come alive. Every time you do this it will be different. Here are close ups of each card.


I dried each panel with a heat tool. Then I ran the edge of the paper over my embossing ink pad and applied gold embossing powder on all the edges and heat set the embossing powder. Then I stamped my sentiment on each panel. I mounted each panel on fun foam and then adhered them to my A2 size card bases. Lastly, I added a few sequins.


Which color combination is your favorite? Let us know! Have a great weekend and I hope you have some time to get crafty!

Tuesday, January 5, 2021

Roses are Red and So are Penguins!

 Hello Friends!  

I hope everyone enjoyed Christmas, New Year's and time off with your families.  

As you have probably already noticed in stores, we are headed full speed towards Valentine's Day.  I got this wacky idea (trying to think outside the box, lol) that I needed a red penguin on a Valentine's Day card.  Here is the end result!


So, I kind of love him!  I did add a heart to his tummy- I used a heart stamp from the Sweet Little Lamb Stamp Set.  This sweet guy is from the Winter Hugs Stamp Set, as is the sentiment.  He was colored with Copics and then fussy cut out.  I was a bit stumped from there.  Several different backgrounds, layouts, and color schemes later, I was still without anything but this cute bird.  I rifled through some patterned paper and happened across this pink and red graphic paper that is perfectly 'Valentiney'.  Best part is it already had the heart shape die cut from it from some previous project.  It was the perfect way to finish off this cutie.  I added some sequins and stamped Happy Valentines Day on the side- the stamp I used is from the Lots of Love Stamp Set.  I tried to get a picture here, but with bad lighting due to a very dreary day, I could not get a good photo of the inside of the card.  Here are both stamp sets that I used~


This next card is also monochromatic red and it started out as a Valentine's card as well, but as you can see, it did not end up as such.  


Isn't this just the best bird image?!?!  If you like realism (like me!) then this is THE bird image for you.  This guy is from the Singing Praises Stamp Set.  I stamped him with Versafine Onyx Black Ink using my MISTI and then water colored him with my well loved Ken Oliver Colorburst Watercolors.  The bird was fussy cut out.  

For the background, I decided to use the faux water coloring technique.  The floral image is my favorite in the Flower Garden Stamp Set.  Once the background was dry, I die cut a circle out of it and them popped up the negative panel on the card base. I stamped the sentiment and added a few sequins and called it done.  If you want to see my inspiration for this card, head over to my blog!  

Please excuse the photos, all.  I am still getting used to a new computer, new editing program and trying to take photos with my phone.  I will get there eventually!  
Don't forget, the January Release Bundle is available through January 9th- you can save over 10%!  
And with your purchase of $75 or more you get free shipping!  AND, with a purchase of $60 or more, you get the January Stamp of the Month- Happy Mail- for free!  


That's a lot of free! 

Thanks so much for stopping by and have a wonderful week!

Lee Ann  

Tuesday, May 5, 2020

Begin Again with Butterflies

Hello All!

Have you checked out the May release yet?  Goodness, I just can't stop playing.  I consider myself a colorist, but the large butterfly in the Begin Again Stamp Set has me playing all sorts of ways.  '
The MOJO had run dry so I have been watching videos to try new things and remind me of old things.  I came upon a video highlighting the faux watercolor technique.  This is a super easy and fun technique where you ink up your stamp with ink and spritz it with water, then stamp on your paper (something that will take water well)- I used watercolor paper. This is what I ended up with; and guys, I played and played and played!

I was getting more creative by the time I got to this card and did some splattering as well.  The sentiment is from the new Encouraging Thoughts Stamp Set, which is also the Stamp of the Month.  Goodness, the font!  I just love he font in this set, and as you can see from the rest of the cards, I used many sentiments in the set!  


This sentiment is from the So Thankful Stamp Set.  


This sentiment is from the Sympathy Morning Glories Stamp Set

After playing with this technique, I went a bit further with it, first stamping the sentiment with the technique I had been using, and then stamping with Versamark in and heat embossing with clear embossing powder.  This allowed me to paint on the background without disturbing the main image. 


As this is a distress technique, I used distress inks for all of my cards.  Some are first generation stamping, some are second and some are third.  Some are heat set after stamping and then stamped over again.  Some are stamped over and not heat seat after the first stamping.  They are all different; in other words, just have fun and play to see what you get!  And, sometimes I got mud, lol.  
In then end, I splattered each card with a bit of watercolor paint in a coordinating color.  
Also note that unless you area only going to stamp one time, you need a stamp positioner to do this. I used my MISTI through the whole process which is what allowed me to stamp multiple times on the same image. 
This set of cards is going to be gifted to a friend of mine who buys a lot of my cards.  This stamp and technique is perfect for making a gift set! 
Thanks for stopping by!  I hope you give this a try!

Lee Ann  

Don't forget, Encouraging Thoughts is the stamp of the month and is FREE with your order of $75 or more! 

The new release is currently available at a discounted price as the May Early Bird Bundle -offer ends May 9th!