Showing posts with label gel press. Show all posts

Wednesday, June 16, 2021

So Tweet by Charmaine Canham

Good Morning and Happy Wednesday! 

Korin has this sweet little stamp and dies set on sale this week, and I thought I
should revisit this cutie and make a sweet evening scene for these two lovebirds!


 How Tweet Stamp and Die Bundle is an older set but so fun to play with. Here is what I did:

I started with a gel print I made but wasn't happy with (but held on to it for days like today!), and it just happens to have blue and orange-pink sections, perfect for our male and female birdies. Since the print was made with acrylic paint, heat emboss the ink to prevent smearing.

Next, I purchased this die from The Ton and have not used it. I think this will be perfect to showcase the stars aligning for these two birds. 

I use Bristol Smooth paper because it is perfect for blending with oxides, I have found. 

After blending the sky, spritz some Shimmer spray on it for a starry glittery sky. Also, glue this piece onto another white piece of cardstock for the white stars to show through from behind.


Play with the placement of the birdies and clouds. I hand cut all the pieces; I wish I had the dies, but it was therapeutic to do. Also, use dimensional foam tape under some elements for interest.


I use Versafine Clair ink for detailed stamping and sentiments.


It was a relatively quick card to make (it would have been faster with dies), but I
 really enjoyed making a cutesie (a different type for me) card. 


I hope you liked today's card and will leave me a comment here or on Instagram.
 I always enjoy reading your feedback!
Have a great day!

Charmaine

Follow me on Facebook and Instagram for almost daily inspiration
Check out my new Website, CharCards.net

*Post includes affiliated links at no cost to you*


Wednesday, June 2, 2021

Perfect Preparation by Charmaine Canham

Hello friends!
I am so very excited to show you today's card.
 I am mixing old with new for a whimsy and fun project. 

I started with a gel print from a recent play with my five-year-old daughter. I just love how she used these colors with her little fingers, not knowing how it will look at the end. Sort of just like today's sentiment... we don't know how it will end, but we know God is preparing us. I white heat-embossed the flowers from the Happy Day stamp set and cut them out by hand.


Next, I silver heat embossed the branches from the new Botanical Branches on white vellum.


The beautiful sentiment comes from an older set, The Future.
This was stamped with a black detail ink and clear heat embossed. 


Now to arrange the blooms and branches. I used double-sided foam tape and regular double-sided tape. The vellum branches are placed right under the blooms with foam tape for movement.
Don't overthink it, just play.


I did add a sliver of black cardstock on the left to balance the sentiment on the other side. 


Isn't she just fun? I hope you liked today's card and mix your old and with new stamp sets!
Have a fabulous day!


Follow me on Facebook and Instagram for almost daily inspiration.


Saturday, May 8, 2021

New Sale at Sweet 'n Sassy Stamps

 Happy Saturday Stampers! It's Michelle here from East Bay Stamp Chick.


We have a new sale at Sweet 'n Sassy Stamps 25% off all stamp set designed by Nina B.

To celebrate the sale I made a new card featuring the Nina B stamp sets Thrill of Hope and Mason Jar Bouquet.

Thrill of Hope is traditionally a Christmas set but I though by adding the sentiment from the Mason Jar Bouquet set it made it more usable anytime. To make this card, I used a panel from one of my gel press prints. I love the gel press because every time you get something different. I though this piece was perfect for a night sky. I heat embossed the images with white embossing powder. I actually made a mistake and that is why the sentiment is on a navy piece of cardstock. I had originally heat embossed it right on the card in white. but I messed it up! So I had to add it on the navy cardstock to cover my mistake. I added a few sequins for shimmer and it's done. A very easy card!

Here's a look at the sets I used.


I hope you find some time this weekend to get crafty! Thank you for visiting and spending time with me today! 


Wednesday, April 14, 2021

April 2021 Release Blog Hop + Giveaway

Welcome to our April 2021 Release Blog Hop!

Who's loving all the fabulous new releases this month? Today we're excited to be sharing a hop full of inspiration with the April release, plus a chance to win a $25 gift code to the Sweet 'n Sassy Stamps shop

GIVEAWAY: Leave a little shout out in the comment section on each stop along the way for a chance to win a $25 gift voucher to the Sweet 'n Sassy Stamps shop. You'll have 2 weeks to comment, with the winner announced here on the SNSS blog, Wednesday, April 28. Happy hopping!


It's also our first hop with our newest cardmaking Creative Team Member... Charmaine Canham! She's been a repeat guest designer for us, and we're so happy to have her and her lovely creations joining the team. Be sure to give her a welcome shout out (and a happy birthday wish, since today's her birthday) when you hop along!


Here's the official hop list. If a link misbehaves along the way,
hop on back here to pick up where you left off.


This month is also Korin and Colleen's birthday month, so in honor of them all, I thought I'd share a birthday card featuring Colleen's new Grunge Elements 3 set and Korin's new Everyday Greetings 2 set and the Script Stencil.

I started with a gel print background from my stash, then stenciled the script using black embellishment mousse and set it aside to dry.  The sentiment from Everyday Greetings 2 is embossed in silver on black paper and I added the dotted line from Grunge Elements 3, then tore around the sentiment to layer over the card.  When the mousse was dry I stamped the stars hearts and grid circles randomly around the panel in grey and black inks, then added some black ink smudged around the edges to finish things off.

Okay, let's get on with things.


Here's a little walk-through of our April release...

First up is the April stamp of the month, Butterfly Background. This set is available for purchase for $11.95, OR you can get it as a FREE gift with a $60 purchase (after any discounts and before shipping and tax) during the month of April! Please note you MUST add this set to your cart to receive the discount. Once your order qualifies, the discount will automatically apply in your shopping cart.


The lovely sample card in the graphic is from Karen and features Butterfly Background, Everyday Greetings 2, and Happy Day.


Creative team member Colleen Gaddie designed the next set, perfect for backgrounds and mixed media. Grunge Elements 3 is sure to be a much reached for set in your collection.


'Tis the season of new beginnings, and what better way to celebrate the happy couples in your life than with these fabulous images illustrated by Krista Hamrick? The Mr. & Mrs. Stamp & Die Bundle includes both the Mr. & Mrs. stamp set and coordinating die set bundled together at a discount. The stamp set and die set are also available separately at regular price.


Our next bundle brings us our first collaboration with Hillary Krippaene of Creative Faith Co. The Thirsty Soul Bundle includes both the Thirsty Soul stamp set and coordinating die set bundled together at a discount. The stamp set and die set are also available separately at regular price.


This month brings us Everyday Greetings 2, another collection of  hand-lettered all-occasion sentiments from Korin Sutherland.


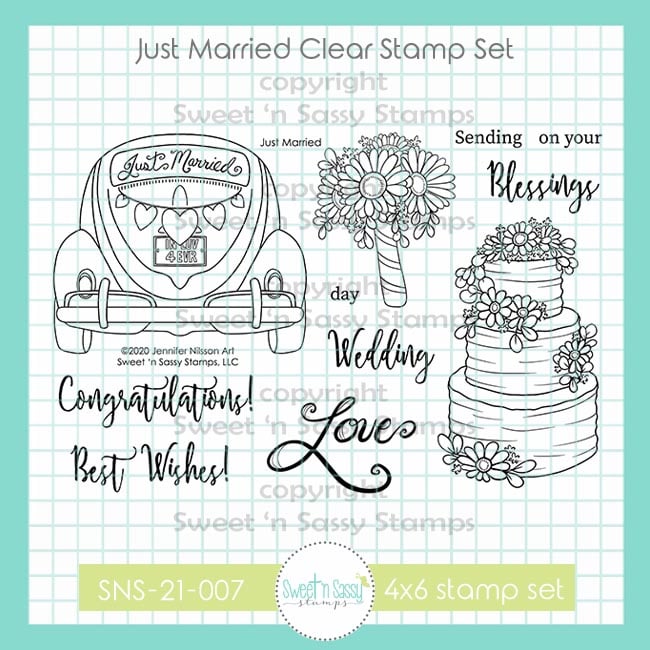
If you loved Nina Brackett's Vintage Van set, then the Just Married set with it's sweet little love bug might be right up your alley.


Along with new stamps and coordinating dies, we have two new stencils debuting this month.


That's our April Release in a nutshell! So many fabulous sets to choose from! What's your favorite? Let us know in the comments.

Your next stop on the hop is Sheri Gilson.

May you be blessed today and always!

    ***This post contains affiliated links at no cost to you ***

Tuesday, April 6, 2021

Morning Glories and Mixed Media

   Good Morning Everyone!  

Last's month's mixed media cards were so much fun that I decided to do it again.  This time I am using the Sympathy Morning Glories Stamp Set.  

I started with a piece of Yupo Paper, alcohol inks ad embossing powder.  Using pink, yellow and orange alcohol inks, I created a inked background.  Next, I stamped the Yupo with Versamark Ink and then carefully heat embossed it in gold embossing powder.  The panel did warp a little, but since I fussy cut the image out, it really did not matter.  

As the image had an Asian flair to it, I decided to go with red and black cs.  I found this black panel in my stash that had been embossed with Translucent embossing paste.  I added that and a red strip of cs and finished off with the flowers, backed with a white circle.  

The sentiment, from the Birthday Wordfetti Stamp Set,  was stamped and heat embossed in gold on black cs on a narrow strip of paper and then adhered to the card.  I did not feel any need to add bling to this.  You can see all of the shine and texture here~


Next up, another mixed media card using the Sympathy Morning Glories stamp set, but much simpler and subdued- much more appropriate for a sympathy card~


This card was started with a gel press print in blue.  I die cut a circle from it.  It would make a good base for some monochromatic blue flowers.  The flowers were stamped with Memento Tuxedo Black ink and colored with Copics.  I tried to stay really light, but I have such a hard time doing that!  

Once colored, I fussy cut the flowers out.  I opted to mount the circle and flowers in the bottom right corner of the panel, but the card seemed to need a little more so I added a white card front die cut.  The sympathy sentiment strip and a few sequins finish the card.  

And I cannot finish this post without sharing something from the new release! 


Yup, still trying to keep things, light, soft and pastel!  This time I colored the beautiful cake from the Just Married Stamp Set and fussy cut it out.  I kept things simple here, adding it to a patterned paper circle with a sentiment strip.  

Tuesday, March 16, 2021

Mixed Media Birds and Blooms

 Hello Friends!  

Today I am sharing projects made with a beautiful and versatile set, Birds and Blooms.  Both cards are also of the mixed media variety.  

This first card is very much a mixed media card- lots of layers, little white space.  


I wanted to play with some new Distress Ink products I got, Speckled Egg Distress Ink and Broken China Distress Glaze.  Various shades of rust, blue and brown shades of Distress Ink were sponged onto the card front.  I did a lot of distress with water drops. While playing with my new Speckled Egg Distress Ink, I decided to use the direct to paper method across the top of the card.  Being a new pad it was very juicy and stay fairly wet.  I took this opportunity to emboss the ink with Broken China Distress Glaze.  For a girl who loves clean, white, space, I love how this turned out.  

The bird and flowers were both stamped with Versafine Onyx Black Ink and watercolored with various watercolors- whatever happened to be handy!  They were fussy cut out and then white gel pen was added to the flower centers.  The sentiment is from the Begin Again Stamp Set and was stamped in Versafine Onyx Black Ink using my MISTI.  

This next card is more my usual style, but don't be fooled- this is mixed media as well.  


This time I flipped through my stash of backgrounds, many of them gel prints.  I found this one with aquas, yellows, chartreuse and black.  I die cut circles from the panel and then pulled out three of them for this collage style card.  I also settled on a mini slimline card.  
The bird was stamped on watercolor paper with Versafine Onyx Black Ink.  I used Ken Oliver Colorbursts to color the bird.  I also stamped the floral branch.  This I did not color.  The branch and bird were both fussy cut out.  
A strip of black cs was adhered along the left edge, circles were adhered to the card front and the bird and flowers were popped up on foam tape.  The sentiment is from the Everyday Greetings 
Stamp Set and was stamped in Versafine Black Ink with the help of my MISTI.  


Saturday, November 14, 2020

Happy Birthday Peonies!


Hey Stampers!

 Michelle here from East Bay Stamp Chick . We are celebrating Sweet n Sassy Stamps turning 13 years this month! And we are celebrating with lots of birthday stamps and cards! For today's card I had some messy fun creating the background on my gel press. Did you know Sweet n Sassy Stamps sells gel press plates??


I used some alcohol inks from stash and let them dry on the gel press. Then I rolled a thin layer of white acrylic paint on top. I pressed the paper on the gel plate and pulled it off. And it gave me this beautiful one of a kind background.


Then I stamped the large peony from the Encouraging Peonies Stamp Set in a deep purple ink right on top of my gel press background. I heat embossed the Happy Birthday from the Bold Birthday Stamp Set  on top of everything. I also added some silver embossing around the edge of my card panel. I mounted it on top of some pink sparkle die cut cardstock from stash and added some sequins for more sparkle. Super easy card with lots of impact.


I hope you take some time to get crafty this weekend and visit the Sweet n Sassy VIP Facebook page for lots of inspiration. Please share your creations with us too! Plus, we will be having sales all month to celebrate our birthday!!