Showing posts with label snowflake flourish. Show all posts

Tuesday, December 30, 2014

Warm Hugs...


Hello! It's Monika here today, bringing you a new card. 

Now that Christmas is over, I am having a hard time switching gears. I am not ready to put all my holiday stamps away yet... so I decided to make a winter card, since that would be still 'in season'. At least for some of us... 


I've been enjoying using water color backgrounds, so I used that technique for the base. I used blue and green colors on water color paper and finished it off with white splatters on top:


 Next I used an other favorite technique of mine, heat embossing on vellum. I heat embossed the image from Snowflake Flourish clear stamp set with white embossing powder. It is the perfect hand-made overlay!


Next I die-cut a border with the scallop star die from Hearts & Stars Scallop Border die set out of silver glitter paper. I used the stars as my embellishments. The tag is hand cut to fit the greeting.

Thank you for stopping by today. I hope I inspired you to make create something pretty today.

Monika


Sunday, October 26, 2014

Shimmering Snowflake Flourish ~

Good Morning Sweet'nSassy Fans! Mary here with a segue to our Christmas Bloghop that is still in session. Be sure to leave a comment for a chance to win $10 gift code to the Sweet'nSassy store..I wanted to share this shimmering card combined with the beautiful Snowflake Flourish designed by DKdesigns.

Instructions on how to create a background is on this post. Check out the video for the technique and create your own card.

Have a blessed Sunday!

Materials used:
Stamps: Snowflake Flourish
Inks: Versamark Watermark ink, Versamagic Aspen Mist
Paper: SU - Glossy, Whisper White, Purple Passion
Accessories: White embossing powder, Ribbon, Spellbinder dies, Rhinestones

Saturday, December 8, 2012

Snowflake Flourish Gift Tag Box...

Hello! It's Monika here today, bringing you a sweet little box full of gift tags. After the Great Gifts Blog Hop, I was inspired to make a Gift Tag Box. The template came from Technique Junkies Newsletter: Great Gifts CD.


The box was really easy to make. I only used one 8-1/2" x 11" card stock to make the box itself. I did use my own measurements, but followed the fabulous tutorial from the CD.
I used Snowflake Flourish, Vintage Postcard, and Poinsettia clear stamp sets.


 I kept most of the tags fairly simple. They are 3" x 2".
To embellish the box and the tags, I used Spellbinders snowflake dies and Martha Stewart snowflake punch... along with Baker's Twine, Rhinestones, and Cheese cloth...

The sketch for the box came from The Sweet Stop, SSS188. Come and play along with us!

Thanks for stopping by,
Monika

Sunday, January 15, 2012

Customer Spotlight Sunday

Hello and welcome to another Customer Spotlight Sunday! Wait until you see the gorgeous inspiration I'm sharing today! I came across a couple of cards in our Splitcoaststampers gallery that I couldn't wait to share here!


The first is from Lee, and she actually was the lucky winner of a free set for playing along with a challenge from our release party.  Lee used the fun Snowflake Flourish clear stamp set  on her card.


The second card I'm swooning over today is from Beate.  I love how she highlighted those poppies from the Poppies and Greetings clear stamp set!  This card is her sample for Sweet 'n Sassy Design Diva Holly McMillen's video tutorial for the Frosted Window technique over on Splitcoaststampers this week.

Thanks so much for sharing such fabulous creations, ladies!  You never know when we'll spot your card in our gallery or on one of our challenge blog linky collections, so be sure to keep those amazing uploads coming (we are always on the lookout in our Splitcoaststampers gallery, over at the Sweet 'n Sassy Connection, Paper Craft Planet, and the linky collections for the Sweet Stop Sketch Challenge and the Digi Challenges)!


Tuesday, December 27, 2011

Together We Can!


Hello again...Julie Ranae with you for one final time.

The end of 2011 is quickly approaching
and as I created this card with a winter theme
in mind, I was continually reminded
that the sentiment on this card applied
to so much more than snowflakes.

So this is my New Year's blessing to you...

We are so powerful as individuals, but
collectively, we can do great things.
So I hope you will make 2012 a year of
being creative in new and exciting ways.
Get together with friends or join a blog hop.
Whatever you do, make an effort to
team up with someone because together
'we CAN do so much'!


I broke out some vintage Heidi Grace paper to make
this final creation which really focuses
on the sentiment from the
'Snowflake Flourish' set.
The die cut tag was stamped with the individual
snowflake and the verse and that was it.
Always remember, when you buy a set of stamps
you don't always have to use the biggest
images in the set.
Even the tiniest ones can make an impact!

I want to thank Korin, Taylor and the
designers at SNSS for making me feel
so welcome and for letting me grace
the pages of their beautifully inspiring blog.

I hope you will visit me over at
and when you do, please say hello.


What I used to create this project:
Stamps: Snowflake Flourish from
Designer Paper: Heidi Grace
Ink: Slate from A Muse Studio
Embellishments: Ribbon from American Crafts
Tools: Label die from Sizzix, Big Shot

Tuesday, December 20, 2011

Christmas Wishes

Hi there...Julie Ranae here with you once again.
I can't believe that my time with SNSS is
nearly over, but I've had a great time playing
this month with the
'Snowflake Flourish' set
and here is one more Christmas-themed card
just in time for the holidays.


This is definitely a 'busy' card, but when you 
break it down,
it's pretty easy to assemble.
I stamped the large flourish stamp in 
two different colors
and placed one at the top and one at the bottom,
both running 'off the page'.
Then it was a matter of placing my embellishments
where they were most effective.

Here is a closeup up of the snowflake embellishment...


I am so glad you were able to stop by during
such a busy time.
I have just one more post for you next Tuesday,
and will be bringing you a CAS winter card
so until then...

Have a Very Merry Christmas!


What I used to create this project:
Stamps: Snowflake Flourish from
Designer Paper: 'Lost & Found Christmas'
 from My Mind's Eye
Ink: Currant & French Roast 
Embellishments:
Die Cuts 'Lost & Found Christmas'
from My Mind's Eye 
Brad & Pearls from Recollections
Tools: Snowflake die from Spellbinders
Big Shot

Tuesday, December 13, 2011

Warm Hugs


Hi everyone!

Julie Ranae here and so glad to be back with another
quick and easy
project for you this holiday season.

I don't know about you, but I am always looking for a
way to create fun cards that are easy,
but don't appear that way ; )


That's what we have here with this simple card.
The only stamping that has been done uses the single
snowflake from the 'Snowflake Flourish' set.
It's hard to tell from this photo, but I only stamped
half of the base card and the top tag. 
From there, I just die cut my snowflakes, 
layered coordinating cardstock, and done.
Easy peasy!

I love having these types of simple cards on hand during the
Christmas season because I always find
that there are additional
cards that I end up sending out here and there.

Of course the 'Snowflake Flourish' set is perfect for
the winter season in general,
so if you don't have it in your
stamp collection yet, I hope you'll pop over to the shop and get it ordered...
you will LOVE it!


What I used to create this project:
Stamps: Snowflake Flourish from
Sweet 'n Sassy Stamps 
Designer Paper: Bo Bunny 'Blitzen'
Ink: Sky & Slate from A Muse Studio
Embellishments:  Brad from
Making Memories

Friday, December 9, 2011

Snowflake Flourishes

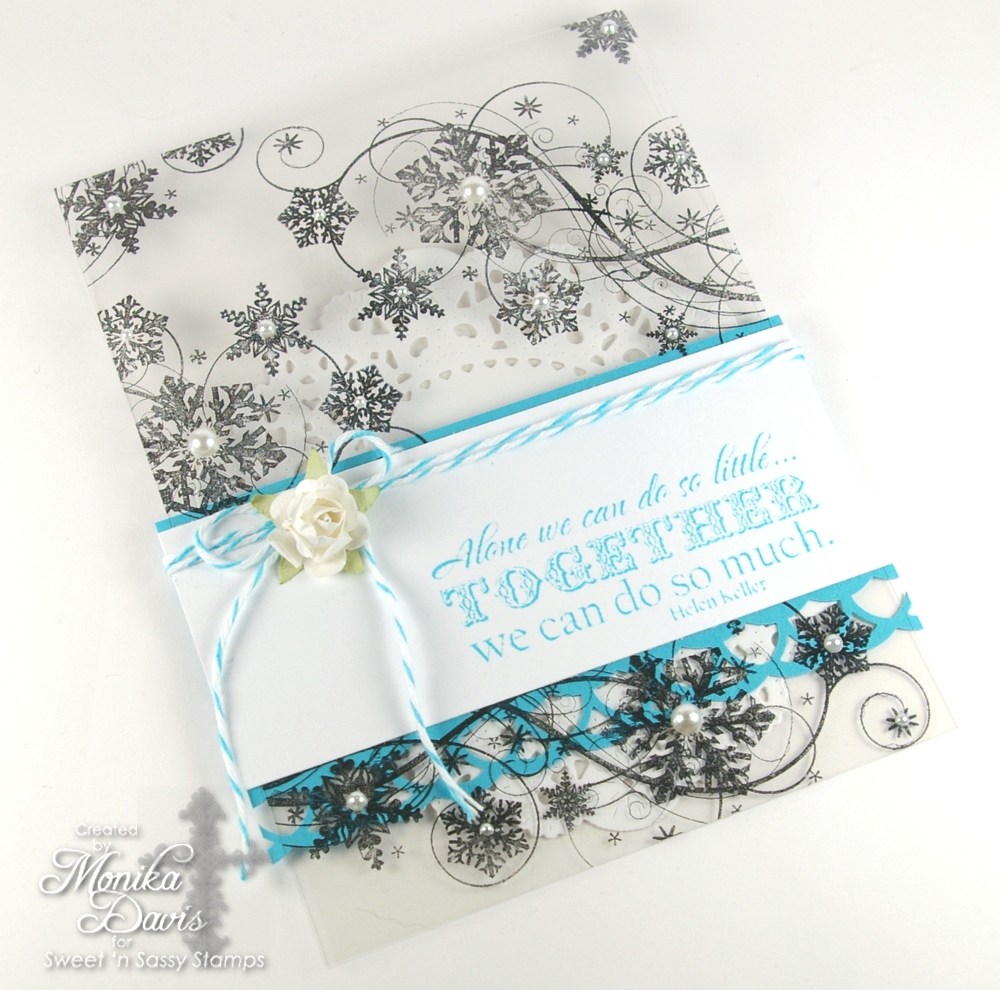
Hello! It's Monika here with a Clean and Simple (CAS) card.
I've been wanting to brake in my Snowflake Flourishes clear stamp set. It is such a lovely set and can be used for any occasions during the winter months.
I decided to make a card, using a clear sheet. You can find it in craft or office supply stores.
I stamped the flourishes with Black StazOn ink on the clear sheet. The greeting was stamped on a white strip of paper. Then the front was decorated with Pearls, Caribbean Baker's Twine, and a paper flower.
The turquoise strip was punched with a Martha Stewart border punch and was attached inside of the front cover. This way I was able to cover the adhesive. I needed a place to write a message, so I die-cut a doily with Cheery Lynn French Pastry Doily die. I attached that to the inside. To cover the adhesive I used on the doily, I also attached a small circle to the back side of my card.
Hope I inspired you to make something today.
Thanks for stopping by,
Monika

Tuesday, December 6, 2011

Bejeweled Snowflakes

Hi everyone!  Julie Ranae here with you today.
I am so excited and honored to have been asked to be
the December Guest Designer here at
Sweet 'n Sassy Stamps.

It was not a tough decision for me when it came to which stamp
set I wanted to play with this month.
I fell in love with Snowflake Flourish the day I laid
eyes on it and have had a great deal of fun working on
different design ideas.

This week, I'm bringing you a pretty simple design
but one that I think is fun and effective.


I layered two different inks on top of one another and
stamped the flourish on crisp white cardstock.
From there, it was a matter of finding an array of
gemstone brads to compliment each snowflake.
Don't you just LOVE the font on the sentiment?!
I sure do and love how beautifully it stamps in
a Slate Grey ink.  From there, it really is just a matter
of layering the pieces
on complimentary cardstock panels before placing it on the card base.

Here is a view from the top down showing how
dimensional the brads make this card...


Easy-peasy but with an elegance as well.

I'm so glad you came by today and I am really looking
forward to sharing with you each Tuesday this month!

What I used to create this project:
Stamps: Snowflake Flourish from
Sweet 'n Sassy Stamps
Ink: Ocean & Slate from A Muse Studio
Ocean Depth by VersaMark
Embellishments: Gems/Pearl brads by
Making Memories,
American Crafts and The Paper Studio

Saturday, December 3, 2011

Fabulous Folds

Hello friends!  Hope you are enjoying your day!  I've been having fun playing with some fabulous folds from the new 3D and Fun Folds CD produced by Technique Junkie Newsletter.  TJN joined up with Sweet 'n Sassy Stamps for a blog hop yesterday. Here are my two projects I created for the HOP! The first one is a "Pleated Front Card."


I began with a craft card base and stamped the snowflakes and swirls from the "Snowflake Flourish" clear stamp set with Fresh Snow ink.  The card front was then scored and pleated.  Each edge was sponged with Fresh Snow ink and pierced.  The "Winter Friends" digi was sized to fit the front of the card and colored with copic markers.  Polar White Flower Soft, Diamond Stickles, a snowflake die, and several small gems add sparkle and texture to finish the card.


Here is what the inside of the card looks like.  This was a unique and fun fold to work with and is one of the techniques included in the new 3D and Fun Folds CD!


For my next project I used the "Goodie Box Tutorial."


This is what the front of the box looks like.  A border punch was used for the edges.  The die cut candle image is from the beautiful "Christmas Light" clear stamp set and was colored with copic markers.  Graphic 45 DP was used to decorate the front panel.  Some Glossy Accents was used on the berries and the candle drips.


Here is another view of the "Goodie Box" so you can see the dimensions of the box better.  


I decided to fill my "Goodie Box" with little tea light candles since it fit the theme of my card.  When you open the box...


you will see a little pocket with a message tag on the left and a package of tea light candles on the right.  The wonderful thing about this fun fold is that it can be adapted to fit any occasion and makes such a lovely gift!


Hope you've enjoyed these projects!  Thanks for stopping by...have a fabulous weekend!

Wednesday, November 30, 2011

~ Warm Hugs on a cold winter day ~

Happy Wednesday, Friends!

As I write this post, I am sitting in my living room with only the lights of the Christmas tree.   We haven't decorated the tree just yet as we have a new kitten (he's just over 3 mo old) and we're going in stages so that he learns to stay clear of the tree.  So far, so good!  The soft glow of the white lights is so relaxing.   I'm ready to start playing some Mannheim Steamroller!

This week it's starting to turn a bit colder, so I was thinking of warm things.  Hot chocolate, chai tea, a roaring fire in the fireplace and my favorite blanket.

With those things in mind, I came up with my card to share today...


Here are my details:

Stamps:  Sweet N Sassy Stamps' Snowflake Flourish Clear Set
Papers: GP White, Crumb Cake, Cherry Cobbler, Lost and Found Union Square dp
Ink: Riding Hood Red, Tim Holtz' tea bag distressing ink
Accessories: 5/8" deep red/white gingham ribbon, fleur de lis frame die, corner rounder, The Twinery red/white twine, stardust stickles, gold 1/2 pearls, dimensionals, sticky tape, MS snowflake punch

~*~*~*~*~
Thanks so much for stopping by today!  
Warm HUGS!
:)

Thursday, November 24, 2011

Warm Chocolate Hugs

This week's CAS challenge over on Splitcoaststampers is to make a card with a winter/holiday theme.  Easy peasy for me, because I am currently in love with this gorgeous Snowflake Flourish set.  I kept my card super simple, and added the sentiment on a quick little banner I made.  I spritzed the left side with some water and rolled the edge around my paper piercer.  Spritzing it with water helps it roll smoothly.  I fussy cut a few snowflakes to pop up on foam tape as well. 

Important SHIPPING Announcement: 
Sweet 'n Sassy Stamps will be closed over the Thanksgiving holiday to enjoy time with our family. You may continue to place orders however we will not be shipping November 23rd-November 30th. Shipping will resume December 1st. Thank you for understanding.

Supplies: 
Stamps: Snowflake Flourish (SNSS)
Card Stock: Kraft (Bazzill)
Ink: Rich Cocoa (Memento)
Tools: paper piercer (to roll edge), spray bottle (Stampendous)

Wednesday, November 23, 2011

Snowflakes

Greetings everyone and welcome to the Thanksgiving Eve (well it's almost eve) post! Hope everyone is ready and excited about tomorrow's Thanksgiving festivities! We're looking forward to spending the day with a few couples from church. It's been a tradition for the past 10 years or so and we always have a wonderful day!

As for today's card, I couldn't help but share a card made with one of the newest releases, Snowflake Flourish. Let's see, I love snowflakes and swirls and this set combines those two ideas into one image...swoon...I'm in love! The large snowflake swirl image was used on the white paper banner, which also has a hint of Tumbled Glass Distress Ink on the edges. I also stamped a few of the single snowflake images in a darker blue (Chipped Shappire), cut them out, and popped them up with foam tape. I love this large sentiment and decided to add a whole lotta rhinestones around the edge of the circle to add that extra bling. The designer paper is from Little Yellow Bicycle and has become one of my favorite winter lines.

I hope you enjoyed today's card and I'm wishing you all a Happy Thanksgiving!