Showing posts with label Decorative Plaque dies. Show all posts

Wednesday, December 16, 2015

Winnie's Warm Wishes~

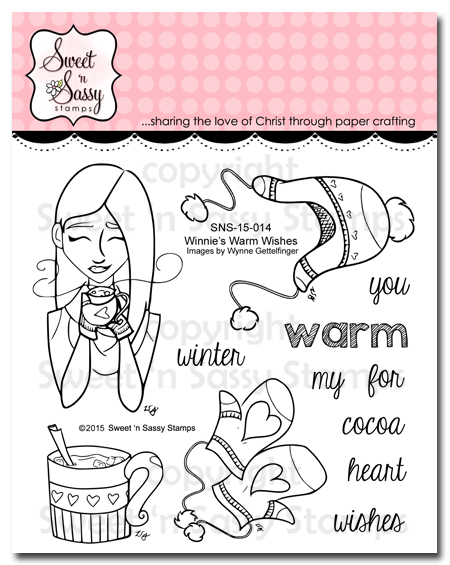
Good morning! Mary here to share this adorable image from Winnie's Warm Wishes. The rhinestone swirls were added to depict the hot steam from delicious mugs of cocoa. Sound like the right season for that!
The background is created using colour bursts and Winnie is coloured with Tombow's on mixed media paper. She is die cut from the Decorative Plaques die set. The rhinestone swirls are hightlighted with white fine point sharpie. 
http://cdn2.bigcommerce.com/server1800/d6aaa/products/1243/images/3728/SNS_15_014WinniesWarmWishes__94016.1423184793.1280.1280.png?c=2  http://cdn2.bigcommerce.com/server1800/d6aaa/products/1233/images/3678/SNSD_16DecorativePlaques__66828.1420766587.1280.1280.png?c=2
Have a wonderful Christmas as you celebrate with family and friends! 
 
Materials Used:
Stamps: Winnie's Warm Wishes
Inks: archival ink black, tombow markers, colour bursts, versafine black 
Paper: mixed media
Accessories: rhinestones, SNSS Decorative Plaque dies, sharpie

Tuesday, October 6, 2015

Warm Winter Wishes ~

Good morning everyone! Mary here, sharing a quick warm wishes card from Winnie's Warm Wishes. She is coloured using my latest fad of colouring with Tombows on mixed media paper. I layered her onto decorative plaques dies and the sentiment is stamped on a punched oval. To give added interest, I added the hearts scallop border die and stitched on my card! 

Winnie's Warm Wishes is part of the latest Sweet Perks Club for the month of October!

Materials Used:
Stamps: Winnie's Winter wishes
Inks: Tombows, archival ink, SU, QQ powder puff inks
Paper: SU, MME, mixed media
accessories: SNSS decorative plaques die, SNSS hearts scallop border die, SU punch, ribbon, stitching.

http://cdn2.bigcommerce.com/server1800/d6aaa/products/1243/images/3728/SNS_15_014WinniesWarmWishes__94016.1423184793.1280.1280.png?c=2     http://cdn2.bigcommerce.com/server1800/d6aaa/products/1233/images/3678/SNSD_16DecorativePlaques__66828.1420766587.1280.1280.png?c=2    http://cdn2.bigcommerce.com/server1800/d6aaa/products/830/images/2201/SNSD_08HeartsandStarsScallopBorder__33663.1388165515.1280.1280.png?c=2

Thursday, August 13, 2015

Thank You for Everything

Hi folks! Kim here today to share a card I made recently for some of my family members after a recent trip to NY. 

Last month my family and I traveled to NY to visit with my extended family, and we ended up staying with my aunt and uncle. This was the first time I had stayed with them since I was very young and here we were moving in to their "no kids at home any longer" house for a week with our two kids and all that comes along with two kids. I was feeling a little nervous about how much we might disrupt their schedules. We ended up having a delightful time! Not only were they amazingly gracious, but it was great to get to catch up and visit with them for the week. One of the best NY trips to date...

As soon as we returned home, I got to work on a card to send them and thank them for their hospitality. I adore the Lovely Lotus stamp set and decided to use that for my card. I started by using the Floral Pattern Background stamp to create my own custom paper. I intentionally went with a more worn look to the background by not applying strong pressure to the stamp when I made the impression on the paper. 

I then used the Decorative Plaques die set to cut out the frame. Next I stamped the Lotus bud on the frame a few times and then again on a scrap piece of cardstock. All were colored with Copics and a few were fussy cut. Stamping directly on the frame and cutting out a few buds allowed me to layer the flower buds and create a lot of dimension. I finished the card to adding a sentiment, embossed piece of cardstock, and a few rhinestones.

I hope you enjoyed today's card!

Saturday, June 13, 2015

Mr. Fix It

Hi Sweet 'n Sassy friends!
It's Ceal here to share a Daddy's Day card with you. Sorry for he late post, we had VBS all last week and my body and brain are just a little tired and I almost forgot!
My card today uses on of the newest masculine sets Mr. Fix It. I colored the images with Copic markers and cut it out using the Decorative Plaques dies.


Here are the products I used 


Sunday, June 7, 2015

Rest in the Lord

Are you enjoying the flowers that are blooming?  I sure am!  So I brought the flowers to paper today.
 
I used the Decorative Plaques dies as a starting point in my card design.  I then made a soft colored floral background and stamped the words over top using Thankful Blooms and Wait on the Lord.  Then I filled in the background with some accent butterflies from Parisian Postcard.
 

The white Decorative Plaques panel was centered over the white square layer and both pieces were stamped together.  Then I diecut the pink Decorative Plaques layer to place underneath the stamped piece.  A few accent pearls were added to the lower corner.
 
Have a wonderful day!
♥  Diane


Thursday, April 2, 2015

You're Only...

Hi friends!  Kim here today to share a card featuring the Sassy Cindy stamp set. I think I could be good friends with Cindy...I like her spunk and her one liners are hysterical!  Seriously, only as old as that Facebook photo, which you know is the best one I could find! LOL!

For this card, I used a whole lotta layers, patterns, and textures. When I work with a smaller image, I tend to either like to keep things very clean and simple, or add lots of goodies.  This week, it was lots!  

When I started, I knew that I wanted to frame Cindy, so she didn't appear to just be floating on the card.  The frame keeps her grounded...and this looks like a nice window.  I created the window by using one of the largest dies from the Decorative Plaques set.  Once the shape was cut, I kept the die in place and used an Exact-o knife to cut out the middle, using the die as a guide.  (The dies also have a coordinating stamp set, Decorative Frames.  I did use the stamp with the die.)

Once Cindy was colored, with pencils, I simply cut my cardstock to fit behind the window.  The entire window was attached with foam tape.  The sentiment fits perfectly into one of the Speech Bubbles dies (oh man, I LOVE these dies), and I just added a few mini peals as accents.

I hope you enjoyed today's card!  And, remember, don't update that photo if you don't have to...LOL!

Wednesday, February 11, 2015

Thanks a Latte!

Hi there... Jennie here again and I am excited to be guest designing for Sweet 'n Sassy Stamps this month and wanted to share another card using a favorite coffee set: Pick Me Up.
I used some wood grain patterned paper and layered it with a deep red cardstock adhering it onto a kraft cardstock base. The Decorative Frames stamp/die cut provided a nice base for the mug and was stenciled with an argyle pattern. The mug was stamped using Memento Luxe Love Letter ink and embossed using clear embossing powder before adhering it with dimensionals. I did the same with the sentiment along the bottom of the die cut.
Here is a close up: 
  This is obviously my go to coffee set and LOVE the mug!
I have another SNSS card over on my blog so hope you will pop on over. Thanks so much for stopping by and I hope you have a wonderful day! 
Blessings, 

Sunday, May 18, 2014

Thoughts of Peace.


Good morning!

Jessica here with a rather bulky card to share with you today that I made using several fun products from Sweet 'n Sassy Stamps! 

I used the new Thankful Blooms die collection for the felt flowers.  I cut a spiral shape into each flower and then rolled it up to form a rolled rose.  The sentiment is from God's Will and it's stamped on a Decorative Plaque die cut, stamped with the coordinating frame image from the Decorative Frames stamp set.


I'm very thankful for the promise of this verse.  I hope the truth of this verse blesses you as much as it does me this morning!

Have a wonderful rest of your weekend!
Jessica

Tuesday, April 8, 2014

Blooming with Thanks

Hello Everyone!

We have all been waiting patiently for winter to be over, and I think we can safely say that spring is finally here!  I just love all of the great spring sets that Sweet 'n Sassy Stamps will release this week!  I have a sneak peek of a wonderful set, reminiscent of bouquets of flowers.


This flower from the Thankful Blooms set is perfect for the rock and roll technique; I stamped my flower two times using this technique.  Both were cut out with the matching die;  I cut one of the flowers out in a swirl, following the lines of the image and then rolled it up like a rolled rose, allowed it to loosen up some and then adhered it on top of the other flower.  I stamped a Decorative Frame and die cut it out with its matching Decorative Plaque Die.  The frame is  used  as a base for the flower. 
The scalloped border is from the Borders and Backgrounds set and was stamped on patterned paper and cut out with its matching Borders and Backgrounds Die.   A doily, some weathered woodgrain patterned paper and some pearls finish off the card. 
I hope you can join us for our Release Party; we will be celebrating Thursday evening (April 10th) at 8pm EST in the Splitcoaststamper Sweet 'n Sassy Stamps forum here

Thanks so much for stopping by today and have a blessed week!

Lee Ann  :)

Thursday, October 17, 2013

Sunflowers

Hello friends! Today, I want to show you a card I made using the sunflower and sentiment from "Prim Blessings Set" and  one of  the "Decorative Plaques Dies" and coordinated "Decorative Frames".
I started with a piece of Ivory cardstock for my card base. I matted a piece of Kraft cardstock and Patterned paper from Bo Bunny "Forever Fall" Collection, distressed and ink all edges and added stitches. Die-cut a frame from Ivory Cardstock and stamped the coordinated border in Memento Tangelo Ink. Stamped the sunflower on Watercolor paper in Jet Black Archival Ink, colored it with Inktense Pencils, then added Crystal Lacquer to the center and sprinkle clear glitter. Added it to the frame with dimensionals. Stamped the sentiment on a piece of Ivory cardstock in Coffee Archival ink and cut it out, added twine and tied it to the frame.
Finally added pearls to opposite corners.

I used the sketch from "The Sweet Stop", you still have time to play along  too :)


Hope you like it!
Have a great day!
Giovana

Sunday, September 29, 2013

Blessings to Ewe ~

Good Morning! Prim Blessings to Ewe from my blog to yours! I adore this little sheep and the sentiment so appropriate for the image. This set was designed by one of very own Divas Diane Zechman. I love that is comes with an ensemble of images and sentiments that remind me of homespun goodness.

The little wooly sheep is coloured using copics and cut using the decorative plaque dies. I paired this with MME paper and stamped the sentiment onto a die from the Bookmarks & More dies. There you have it! So sweet & simple. 

Enjoy your Sunday!
Mary

Materials Used:
Stamps: Prim Blessings
Inks: Memento black, copics, SU Basic Gray 
Paper: SU Basic Gray, Whisper White, Pool Party, MME dp
Accessories: SNSS Decorative Plaque die, SNSS Bookmarks & More dies

Wednesday, September 4, 2013

Bookmark Bits & Pieces


Hi there
It's Ceal sharing with you today a couple cards from our August release. ...September release party is tomorrow night 8pm EST over in our forum at  Splitcoast Stampers so make sure to check in and play along with the release challenges. You will love the September release!
Now on to my cards. For both card I used the set Bookmarks Bits and Pieces one in a CAS style.  
The first one I also used the Decorative Frames set along with the Decorative Plaque die set. I random stamped the globe image for my background and used some October Afternoon design papers.
The second one I just took a sheet of paper out of a little notebook and used distress inks to age it and then stamped and colored my image.
 
thanks for stopping by!
Ceal 

Thursday, August 29, 2013

His Children

Hi everyone!  I'm super excited to be joining you today to show off two of the latest Sweet 'n Sassy releases!  The first is yet another silhouette set that I absolutely ADORE!  I just can't get enough of these amazing sets!  The one that I used on my card comes from the God Is stamp set (the sentiment is included in the set as well) and is right up there as one of my favorite sets, featuring sweet boys (I love me some sweet boys because I have two of my own!) playing.  I even find such comfort in the sentiments...because if you have boys, who seem to make an art out of injuring themselves, I sure can use a reassuring sentiment that God is watching over them.

I used one of the new Decorative Frames (a set of dies with coordinating stamps) set to showcase my swinging boy (I love having a stamp to edge the frame die!).  I paired the designs with great paper from Crate and simply added a few gold pearls to accent a few areas on the card.

Enjoy and be sure to check out all of the latest Sweet 'n Sassy releases!!

Sunday, August 18, 2013

More Fun with the August Release!


Good morning!

Jessica here with a couple of cards I made using some of our fabulous new August release collection!  Have you hopped along each day with the design team yet?  If not, today's the last day to do so and leave comments for your chance to win some fun prizes!  Scroll down on our blog just a bit for more information about that.

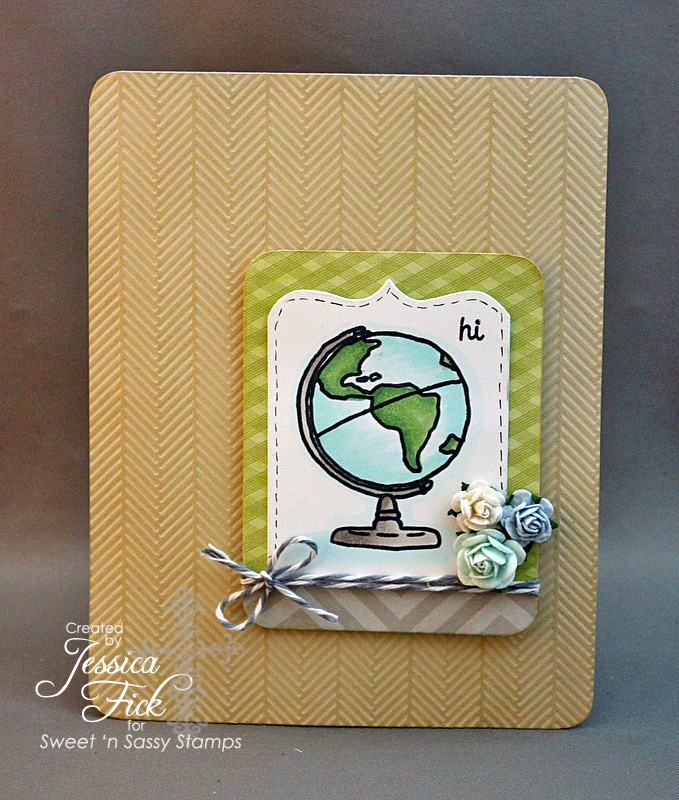
Both of my cards for today uses the must have Bookmark & Bits stamp set with the coordinating Bookmarks & More die collection.  LOVE these new additions to SNSS!  I used my favorite image from the stamp set - the globe!  I've always been fascinated with them and would spend lots of time mesmorized by our family globe as a child... crazy, I'm sure.  I used the frame die image for the globe and trimmed off the bottom of it, tucking the edge behind my baker's twine wrap.  The sweet 'hi' is from the Mini Tags & Sentiments stamp set.  perfection.


My second card uses the globe again, this time stamped repeatedly to create a background on the yellow patterned paper.  The coordinating sentiment was stamped on a Decorative Plaque which was stamped with the matching frame from the Decorative Frame stamp set.  Fun colors - yellow, black, white with just a touch of turquoise in the baker's twine.  Super CAS and super mailable!  love that!


Have a great day - hope you get the chance to 'travel' today, even if it's just by reading a book! 

;)
Jessica

Monday, August 12, 2013

August Release Hop Day #3

Welcome to day 3 of our August feature Blog Hops!  Today we're featuring a wonderful new set, Decorative Frames, that coordinates with one of our existing die sets, Decorative Plaques....a perfect match!


  • Stamp set includes 8 images and 12 sentiments
  • Set measures approximately 6" x 8"
  • The top left image measures approximately 2 3/8" x 2 5/8"
  • Designed by Korin Sutherland
  • Priced at $26
  • Coordinates with Decorative Plaque Dies


Check out some of the fabulous samples made by our talented DT in the thumbnails below.

Be sure to leave a comment of each of the blogs along your journey because
we're giving this stamp set away to one lucky winner!  

The deadline to comment for a chance to win is midnight EST Friday, August 16th.  The list of winners will be announced on our website homepage by Monday, August 19th.

Thanks so much for joining us!  Enjoy the hop!


Friday, July 19, 2013

Kneel

Korin here again this week with another card featuring our new Celebrate Today set.  I love the images in this set because they can be stamped in black like my card today or they can be done in color like my card from the hop on Saturday.


For my card today, I used our wonderful Decorative Plaque Dies to cut out the shape, then sponged it to add some color.  The script in the background is our Light of Christmas Background stamped second generation (stamped off once to make the ink lighter).  Then I stamped the flower images and sentiment.  I added more interest to the image panel with some white dots from a poster paint pen.  The stamped border in the background is done with our Decorative Frame Toppers set.  The lower black border is from a Martha Stewart punch, I believe.

Thanks for joining me today!  Remember, when life gets too hard to stand, KNEEL! <3

Have a great weekend!

Korin


Thursday, April 18, 2013

Happy Mother's Day

Hello!! Giovana here today bringing you a Mother's Day card. A friend of mine asked me if I could make a card for her mom and I said sure!! Asking for little details I got she likes orange and butterflies, so I used them both.

Directions:
  • Make card base from Ivory Cardstock. A2 size.
  • Mat a piece of Orange CS (5" x 3.75")  and Patterned Paper. Add stitches.
  • Add ribbon around.
  • Die-cut a Decorative Plaque from Ivory Cardstock. Stamp sentiment in Jet Black Archival and toppers in  Memento Tangelo. Add piece to card panel with Dimensionals.
  • Die-cut butterflies from Vellum, stamp butterflies in Memento Tangelo. Glue vellum butterflies (I used my heat glue gun) and add them to card. Add small pearls to butterflies.
  • Add medium pearls to corners.
  • Add panel to card base with large Pop dot.

Sweet 'n Sassy Products:
  1. Precious Poppies (Sentiment)
  2. Decorative Frame Toppers
  3. Decorative Plaque Dies
  4. New Beginnings
  5. New Beginnings Butterfly Die

Hope you like it!!
Have a great day!

Thursday, September 6, 2012

Watch the leaves turn ~

stamps: Season of change, decorative frame topper, Autumn Collage
Fall is the season where I cannot help but stop and look at my surroundings no matter the hurry in my day! Our creator God is amazing! Who cannot help but notice? I combined two fall sets to create the card above. Season of Change is especially fun to work with since it has matching dies! The quote I used comes from the Autumn Collage set and it has sentiments that go perfectly with any fall set. Decorative toppers are stamped on the decorative plaque die to finish off the focal image. The leaf is stamped and rolled on various inks to create turning leaf.
Stamps: Christmas Candle, Decorative Frame topper
Christmas Candle was offered as free gift in July with a $50 purchase! Who doesn't like Free right? Well, I wanted to ink it and make a Christmas Card with it. It is coloured using copics, I added the Decorative Frame toppers on the top and bottom of  the image. 

Thank you for stopping by! 

~Mary
 

Thursday, August 30, 2012

Kindness

Hello! It's Monika here today, bringing you a shaped card with some creative folds.
I challenged myself to make a Circle Side Step Card. Beate has a fabulous tutorial on SplitCoastStampers. I followed her directions, but I did make mine a bit smaller, so it fits an A2 envelope.
I am not ready for fall yet, so I used some pretty flowers on my card (no butterflies!). It never gets old or goes out of style, and works for almost all occasions. These pretties came from Kindness clear stamp set, and I used the coordinating Kindness Flower die set.


The frame was made with one of the Decorative Plaque dies and a square die from Spellbinders. To give texture to it, I stamped the wood grain image from Grunge Borders clear stamp set repeatedly on the frame. After cutting the opening out, I glued a piece of old book page behind it, that was spritzed with brown ink.


The background was stamped with Music Background clear stamp set. Another image that can be used for any occasions. I used one more fun die, the grass from Fence & Grass die set

To embellish my card, I used ribbon, pearls, Baker's Twine, Stickles, Cheese cloths, buttons, and a Tim Holtz pin that holds the greeting.

Hope you will challenge yourself to make something different today! Give your creativity a go!

Monika

Monday, August 27, 2012

Wishing you

Hello!! Hope you all are having a fantastic day! August is coming to an end and with season changes, which I really love! Fall is my favorite season, so I decided to create a Fall card using "Leaf Silhouettes" set.
This card is super easy!! I stamped 3 of the leaves on White cardstock in Wild Honey Distress Ink, cut them out and then ink all edges with Spiced Marmalade and Vintage Photo Distress Ink, love the result!
I added stitches all around the card, die-cut 3 scallop edges borders from Patterned paper. Added them to card front, as well as small gold nail heads and a bow with a big gold pearl brad.
I stamped the sentiment on Ivory Cardstock, die-cut it using one of the Decorative Plaque dies. Added to card with foam tape, added the leaves and you are done :)


Products Used on this Project:
Hope you like it!!
Have a great day!
Giovana